DesignCad
- Started
- What's New V.4.7
- Getting Started
- Home Screen
- Dxf Send/Receive
- Model Design
- Point Operations
- Grading
- Pieces Operations
- Plot Piece
- Print Piece
- Measurement
- Sewing Processes
- Dart/Pleat Operations
- Internal Shape / Internal Point
- Marker Operations
- Marker Print
- Super Marker
- Technical Card Operations
- Cost
- Plot Marker
- Options
Plot HPGL/HP2
Used to plot the prepared marker file on the plotter (drawing) machine.
The marker file can be generated in HPGL or HP2 format, depending on the connected plotter machine. The drawing file format is set from Options > Plotter.
The marker file can be sent to the plotter in two different ways.
1.) Sending to Plotter from the Marker Screen
After the marker has been created in the marker screen, click File > Plotter. ![]() (Shortcut key: P)
(Shortcut key: P)
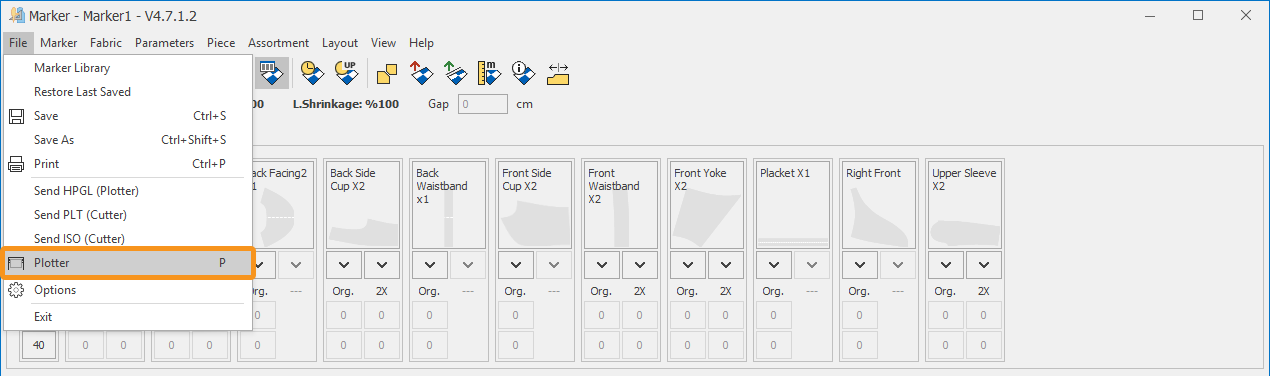
The Plott window opens.
The marker file to be plotted is added to the list with the status Pending.
Select the marker with the mouse, then click the Print Selected Marker from the List button at the bottom left.
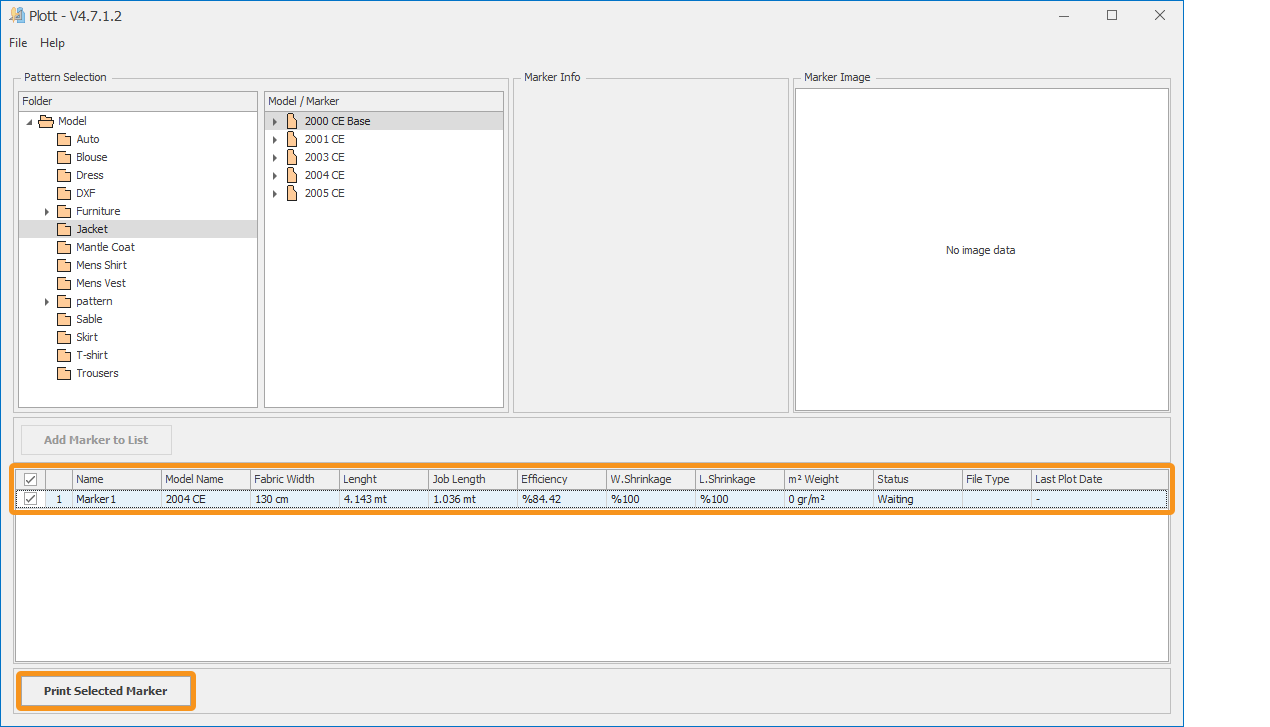
The status of the marker sent to plot changes from Pending to 1st Sent to Plot, and the Last Plotted Date field is updated with the current date and time.

The generated plot file is saved to the specified folder (by default C:\HPGL).
2.) Sending to Plotter from the Plott Screen
If desired, the Plott Screen can also be opened from the main screen by selecting File → Plot (Plotter) or by clicking the Plotter ![]() icon on the main toolbar.
icon on the main toolbar.
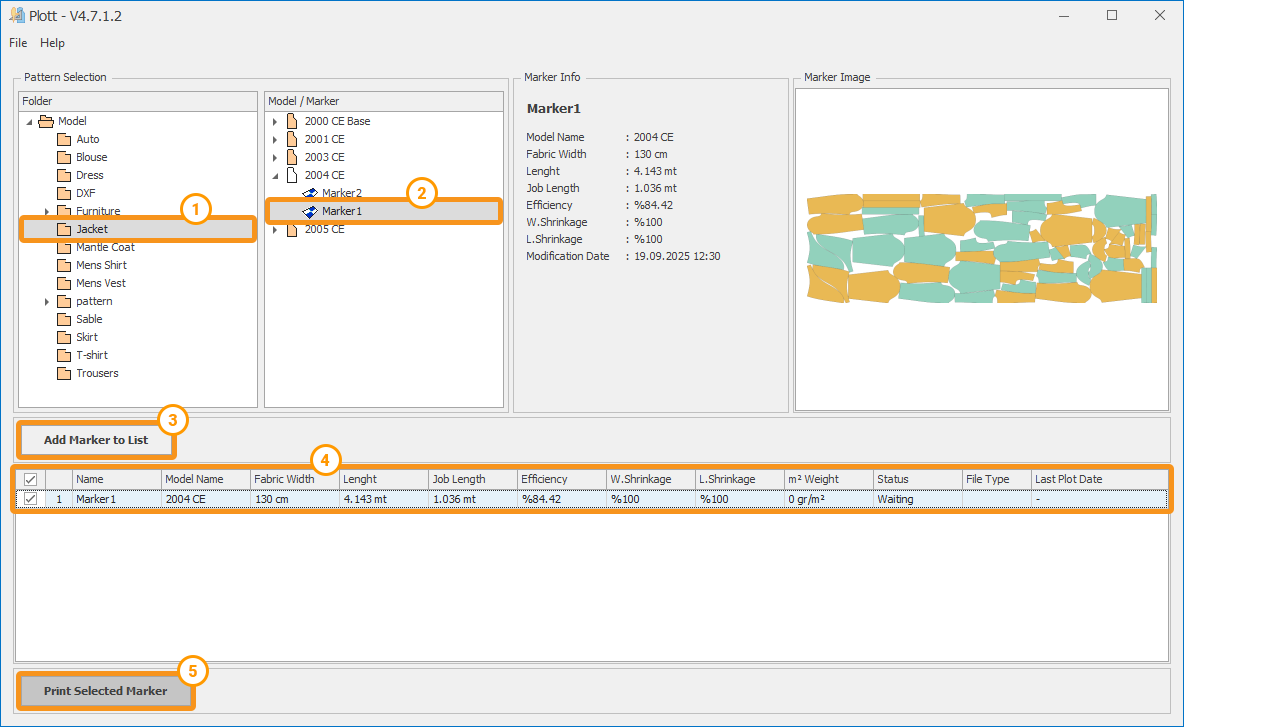
From the opened screen, the marker can be selected as follows:
![]() In the Folder column, select the model folder.
In the Folder column, select the model folder.
![]() After selecting the folder, click the model name in the Model/Marker column, then select the desired marker from the list that appears.
After selecting the folder, click the model name in the Model/Marker column, then select the desired marker from the list that appears.
Once selected, the marker’s details and preview are displayed in the Marker Info and Marker Image sections.
![]() Click the Add Marker to List button to add the marker to the plotting list.
Click the Add Marker to List button to add the marker to the plotting list.
![]() Click and select the row of the marker to be plotted.
Click and select the row of the marker to be plotted.
![]() With the Print Selected Marker button, the file is sent to the designated folder (default path:
With the Print Selected Marker button, the file is sent to the designated folder (default path: C:\HPGL).
After the file is sent, the Status column for that marker changes from Waiting to 1. Sent to Plot, and the date and time of the plotting are recorded in the row. ![]()