Shrink / Receive and Share
Shrink % on X Y
This operation is used in the Pattern Design screen to apply ease or reduction to a piece along the X and/or Y axes.
1.) In the Pattern Design screen, select the piece to which the ease/reduction will be applied.
2.) From the Pieces menu, click the Shrink % on X Y ![]() icon.
icon.
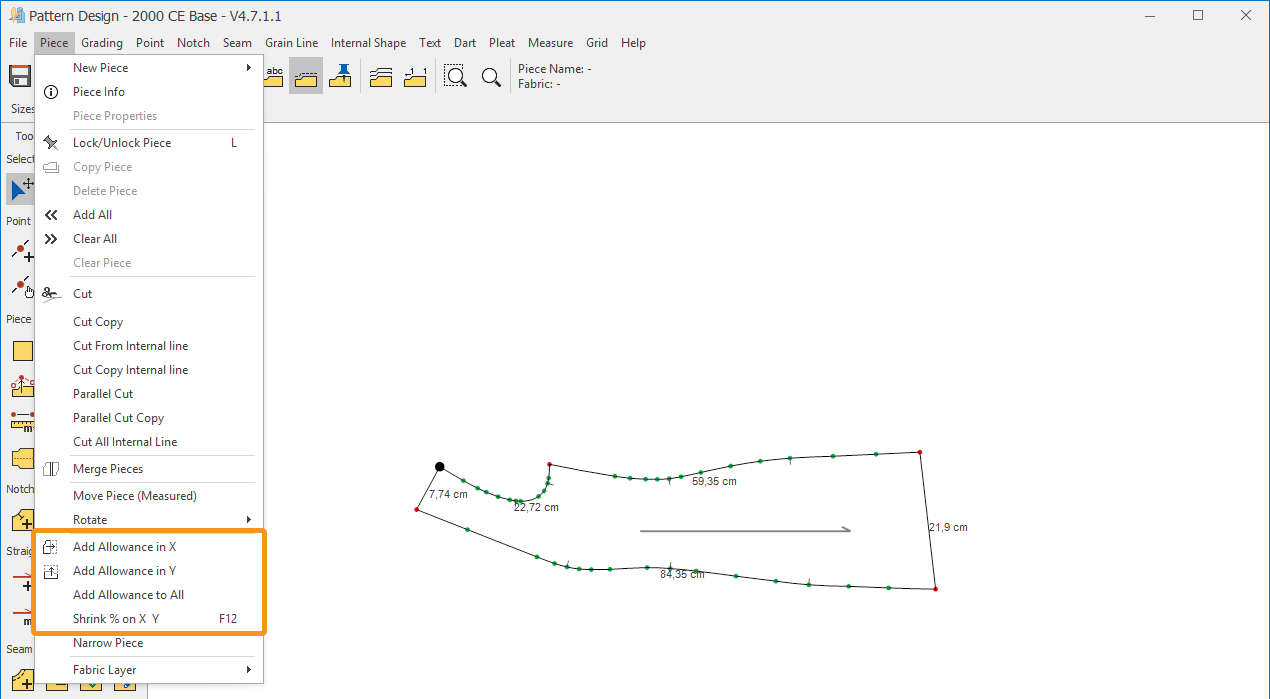
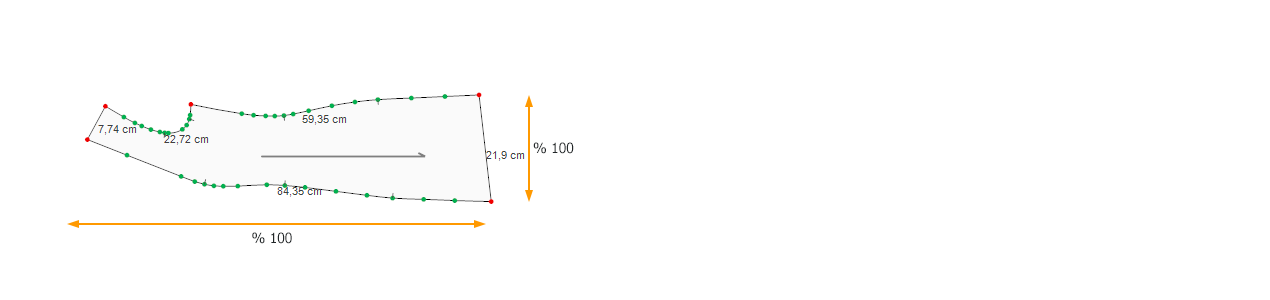
3.) In the window that opens, enter the desired ease/reduction values for the piece in the X and Y fields as percentages. The default value for both X and Y is 100%.
- For reduction, enter a value below 100%.
- For ease, enter a value above 100%.
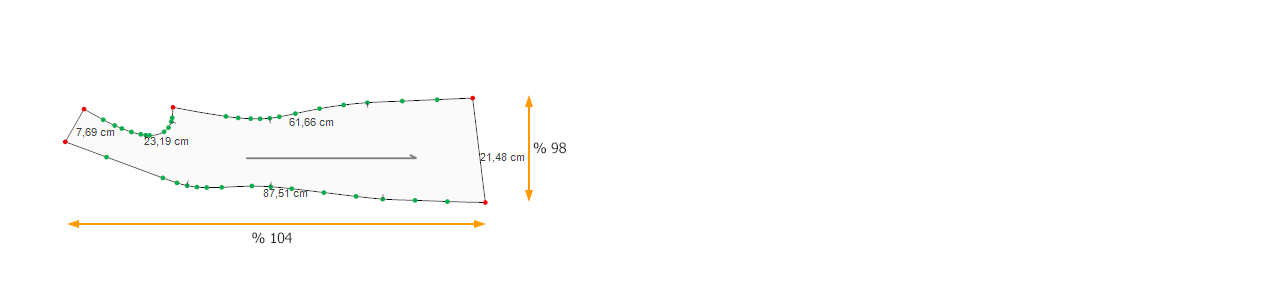
For example, if a piece requires 4% reduction in length and 2% ease in width, enter 104 for X (length) and 98 for Y (width), based on the piece’s orientation on the screen.

4.) Click the Ok button to confirm the operation.
![]() To reset a piece with applied ease or reduction to its original state, reselect the piece, click the Ease % in X and Y icon from the Pieces menu, enter 100% in both the X and Y fields in the window that opens, and click Ok to confirm.
To reset a piece with applied ease or reduction to its original state, reselect the piece, click the Ease % in X and Y icon from the Pieces menu, enter 100% in both the X and Y fields in the window that opens, and click Ok to confirm.
Add Allowance in X
This is used to move one side of a line along the X-axis proportionally while keeping the other side fixed along the Y-axis.
- In the Pattern Design screen, click the Add Allowance in X
 icon from the Pieces menu.
 - A line along the Y-axis appears on the piece. Hold any point on the desired side of this line with the mouse.
After selecting, choose the point to be moved (the movable point) and adjust the line along the X-axis to increase or decrease the allowance.
Points outside the fixed area along the Y-axis remain stationary.
- Press Enter to confirm the operation.
![]() During the operation, pressing the M key opens a window where you can enter a measurement to move the piece by the desired amount.
During the operation, pressing the M key opens a window where you can enter a measurement to move the piece by the desired amount.
![]() After selecting a point, it can be moved using the Arrow Keys on the keyboard with the following increments:
After selecting a point, it can be moved using the Arrow Keys on the keyboard with the following increments:
- Arrow Keys: 1 cm
- Ctrl + Shift + Arrow Keys: 0.5 cm
- Ctrl + Arrow Keys: 0.1 cm
- Shift + Arrow Keys: 0.01 cm
Confirm the operation by pressing the Right Mouse Button or the Enter key.
Add Allowance in Y
This is used to move one side of a line along the Y-axis proportionally while keeping the other side fixed along the X-axis.
- In the Pattern Design screen, click the Add Allowance in Y
 icon from the Pieces menu.
 - A line along the X-axis appears on the piece. Hold any point on the desired side of this line with the mouse.
After selecting, choose the point to be moved (the movable point) and adjust the line along the Y-axis to increase or decrease the allowance.
Points outside the fixed area along the X-axis remain stationary.
- Press Enter to confirm the operation.

![]() During the operation, pressing the M key opens a window where you can enter a measurement to move the piece by the desired amount.
During the operation, pressing the M key opens a window where you can enter a measurement to move the piece by the desired amount.
![]() After selecting a point, it can be moved using the Arrow Keys on the keyboard with the following increments:
After selecting a point, it can be moved using the Arrow Keys on the keyboard with the following increments:
- Arrow Keys: 1 cm
- Ctrl + Shift + Arrow Keys: 0.5 cm
- Ctrl + Arrow Keys: 0.1 cm
- Shift + Arrow Keys: 0.01 cm
Confirm the operation by pressing the Right Mouse Button or the Enter key.