DesignCad
- Started
- What's New V.4.7
- Getting Started
- Home Screen
- Dxf Send/Receive
- Model Design
- Point Operations
- Grading
- Pieces Operations
- Plot Piece
- Print Piece
- Measurement
- Sewing Processes
- Dart/Pleat Operations
- Internal Shape / Internal Point
- Marker Operations
- Marker Print
- Super Marker
- Technical Card Operations
- Cost
- Plot Marker
- Options
Export/Import Model File (zip)
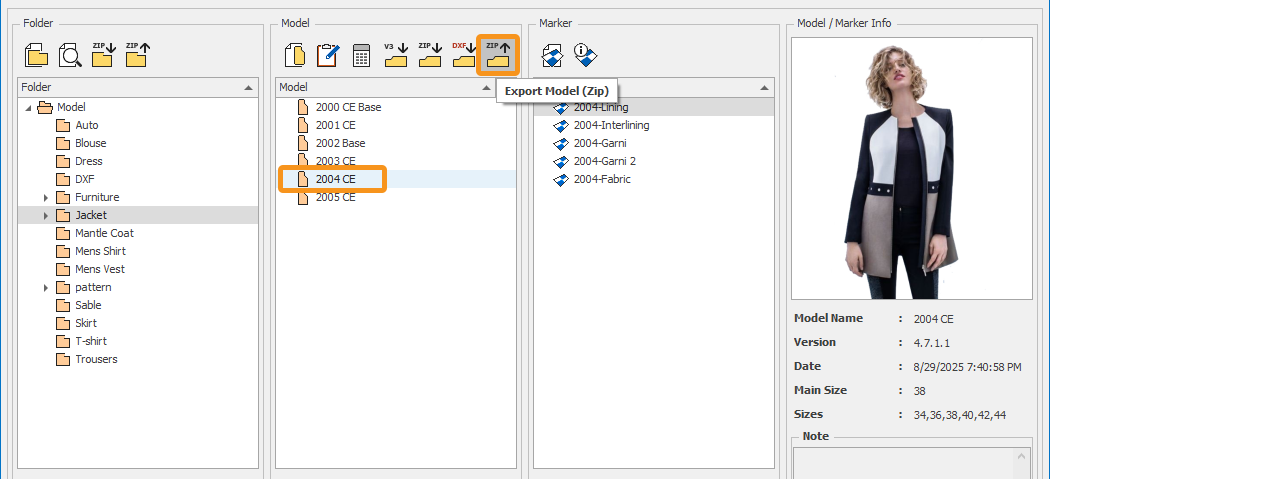
Export Model
To send a model file to a different DesignCad software, follow these steps:
1.) On the main screen, select the model to be sent from the Model column.
2.) Click on the Export Model (Zip) ![]() icon.
icon.
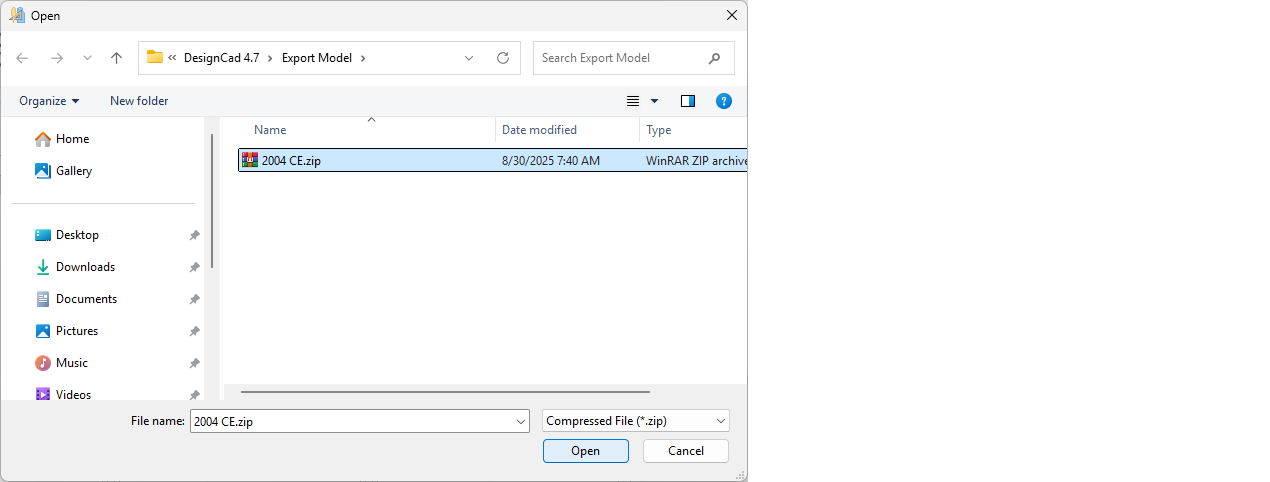
3.) Select the location where the model will be saved.
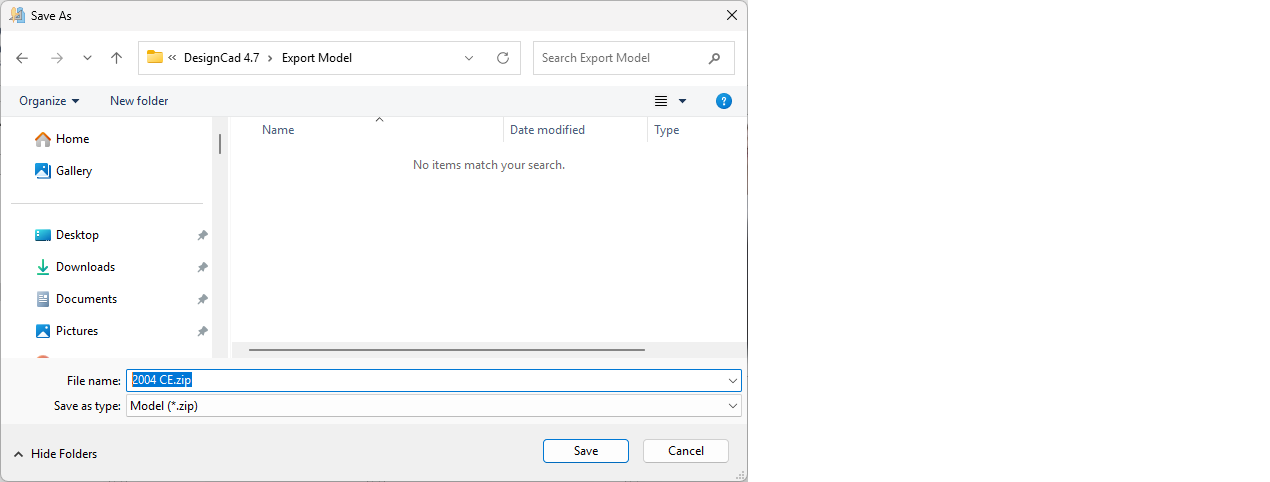
4.) By clicking Save, the selected model is compressed in zip format and saved as model name.zip (e.g., 2004 CE.zip).
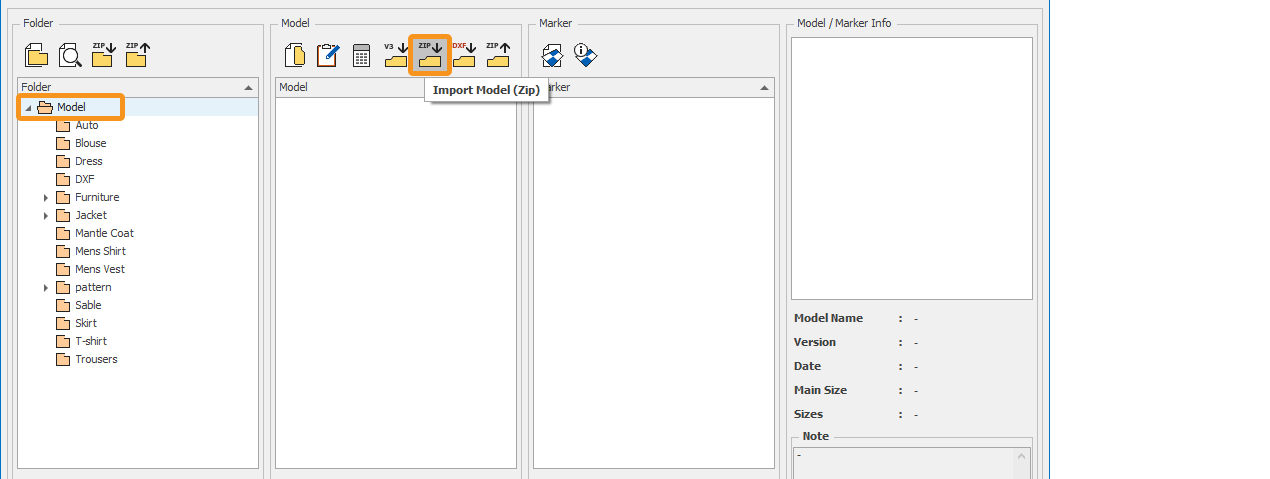
Import Model
To receive a model file created in a different DesignCad software, follow these steps:
1.) In the main screen, select the folder where the model will be placed (or create a new folder from the New Folder section).
2.) Click the Import Model (zip) ![]() icon from the Model column.
icon from the Model column.
3.) In the opened window, select the model file in the modelname.zip format (e.g., 2004 CE.zip).
4.) The model file is imported by clicking the Open button (along with all markers, technical sheets, pictures and cost information).

5.) The imported model file opens in the Model Design or Pattern Design screen.
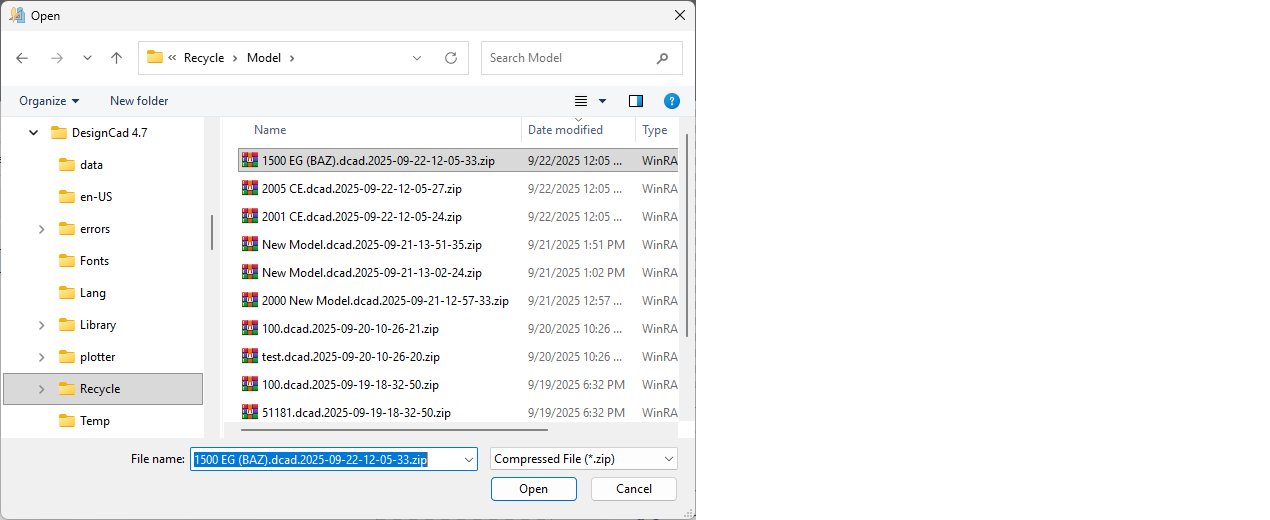
In the DesignCad software, deleted model files can also be restored using the Import Model function.
In the opened window, select the Recycle/Model folder from within the directory where the DesignCad software is installed. (C:\DesignCad 4.7\Recycle\Model)
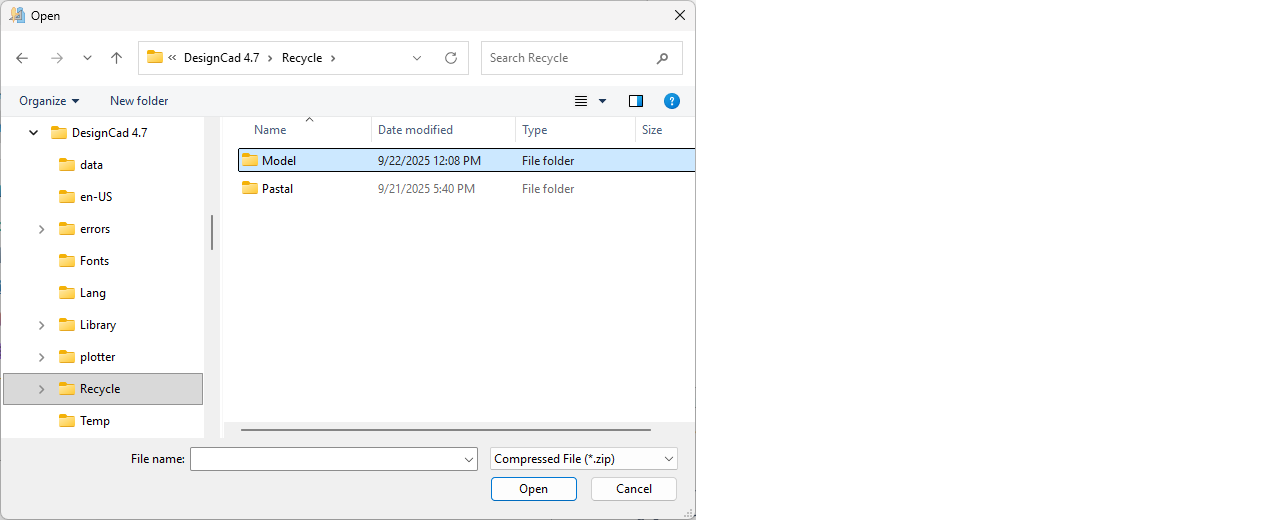
From the opened window, select the deleted model file and restore it by clicking Open.