DesignCad
- Started
- What's New V.4.7
- Getting Started
- Home Screen
- Dxf Send/Receive
- Model Design
- Point Operations
- Grading
- Pieces Operations
- Plot Piece
- Print Piece
- Measurement
- Sewing Processes
- Dart/Pleat Operations
- Internal Shape / Internal Point
- Marker Operations
- Marker Print
- Super Marker
- Technical Card Operations
- Cost
- Plot Marker
- Options
Add Pleat
Used to create a pleat between two points on a piece.
1.) In the Pattern Design screen, click the Pleat menu and select Add Pleat ![]()

2.) Select the first point (1) where the pleat will be applied, and then the second point (2) using the mouse or the Space key on the keyboard.
3.) After the second point is selected, the Add Pleat window opens.
Dart Count: The number of pleats to be placed along the selected line (1→2).
1.Pleat Depth: The depth of the pleat at the first point. (For example, if 3 cm is entered, this value is distributed as 3 cm to the right and 3 cm to the left of the selected point.)
2.Pleat Depth: The depth of the pleat at the second point. (For example, if 5 cm is entered, this value is distributed as 5 cm to the right and 5 cm to the left of the selected point.)
Direction Properties: Determines to which side the folded part of the pleat will lean after it is closed.
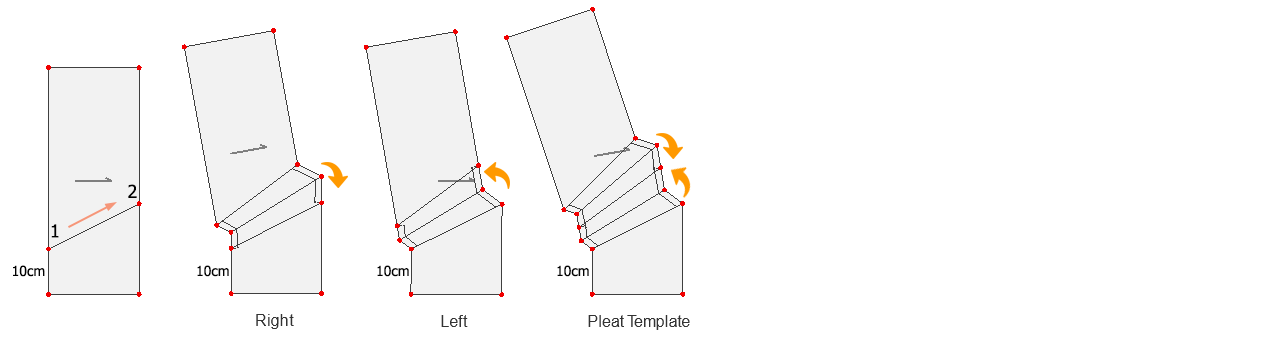
- Right: The pleat at Point 1 folds clockwise.
- Left: The pleat at Point 1 folds counterclockwise.
- Pleat Template: At Point 1, the pleat closes to both sides symmetrically.
Gap Between Two Pleates: If the number of pleats is more than one, this is the gap value to be placed between the pleats.
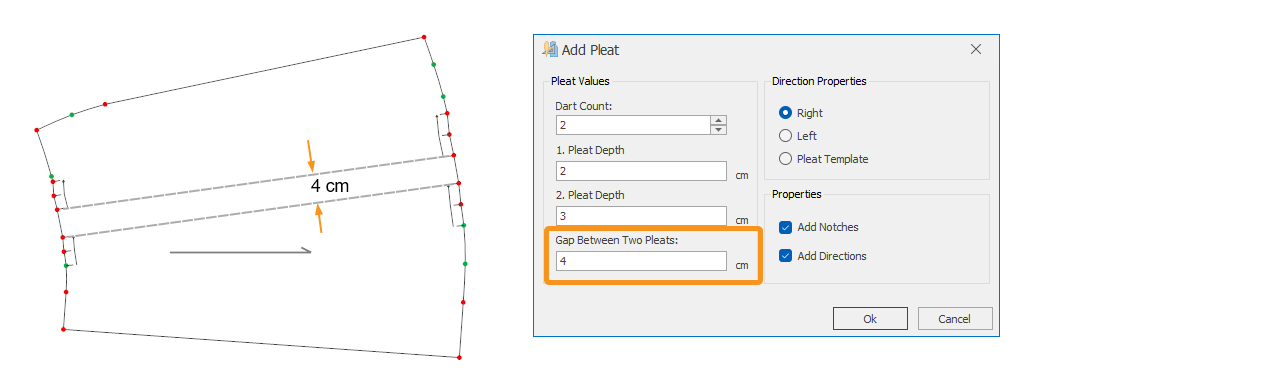
If the Add Notch checkbox is selected, notches are automatically added at the folding points. (Default: selected)
If the Add Directions checkbox is selected, pleat folding direction arrows are automatically added as an internal shape. (Default: selected)
3.) Click the Ok button to apply the pleat to the piece.