DesignCad
- Started
- What's New V.4.7
- Getting Started
- Home Screen
- Dxf Send/Receive
- Model Design
- Point Operations
- Grading
- Pieces Operations
- Plot Piece
- Print Piece
- Measurement
- Sewing Processes
- Dart/Pleat Operations
- Internal Shape / Internal Point
- Marker Operations
- Marker Print
- Super Marker
- Technical Card Operations
- Cost
- Plot Marker
- Options
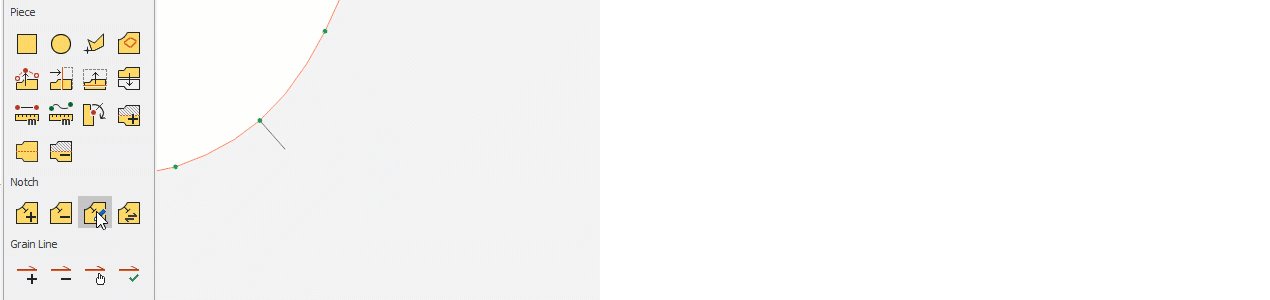
Notch Operations
Add Notch
In the Pattern Design screen, follow these steps to add a notch to the desired point of a piece:
1.) In the Pattern Design screen, click the Notch menu and select Add Notch ![]()

2.) Click on the point where the notch will be added with the mouse, and the notch is inserted. (The most recently selected notch type is added automatically.) The notch placed on the point is automatically reflected in all sizes.
![]() If you double-click on the point where the notch was added, the Edit Notch window will open.
If you double-click on the point where the notch was added, the Edit Notch window will open.
Edit Notch
Used to modify an existing notch.
1.) In the Pattern Design screen, click Notch > Edit Notch ![]()
2.) Click on the notch to be modified with the mouse, and in the Edit Notch window that opens, make the desired changes.
- From the Notch Type section, you can select the notch type (I, V, T, or U).
- According to the selected notch type, the width and length values of the notch can be modified.
- If the Angle checkbox is selected, the angle value field becomes active and the notch can be angled by the entered value. (If the checkbox is cleared, the entered angle value becomes invalid and the notch returns to its original perpendicular position on the line.)
- If the Mirror checkbox is selected, the notch is applied outside the piece line.
3.) After making the necessary changes, click Ok to confirm.
Delete Notch
Used to delete an existing notch.
1.) In the Pattern Design screen, click Notch > Delete Notch ![]()
2.) Click on the notch to be deleted with the mouse, and delete it.