Cost
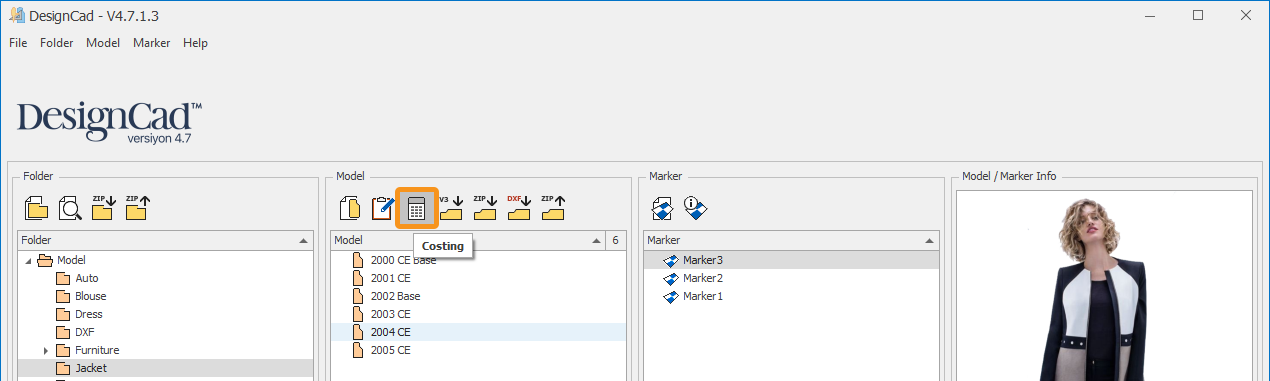
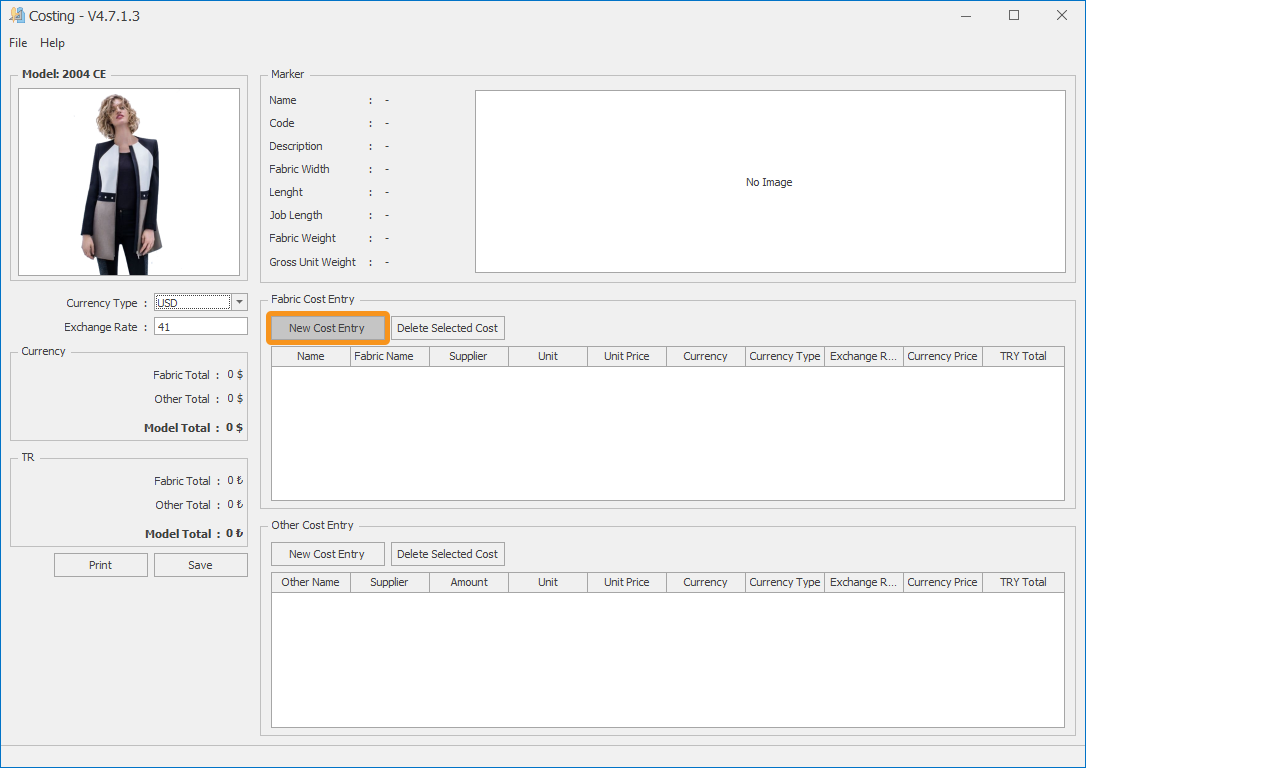
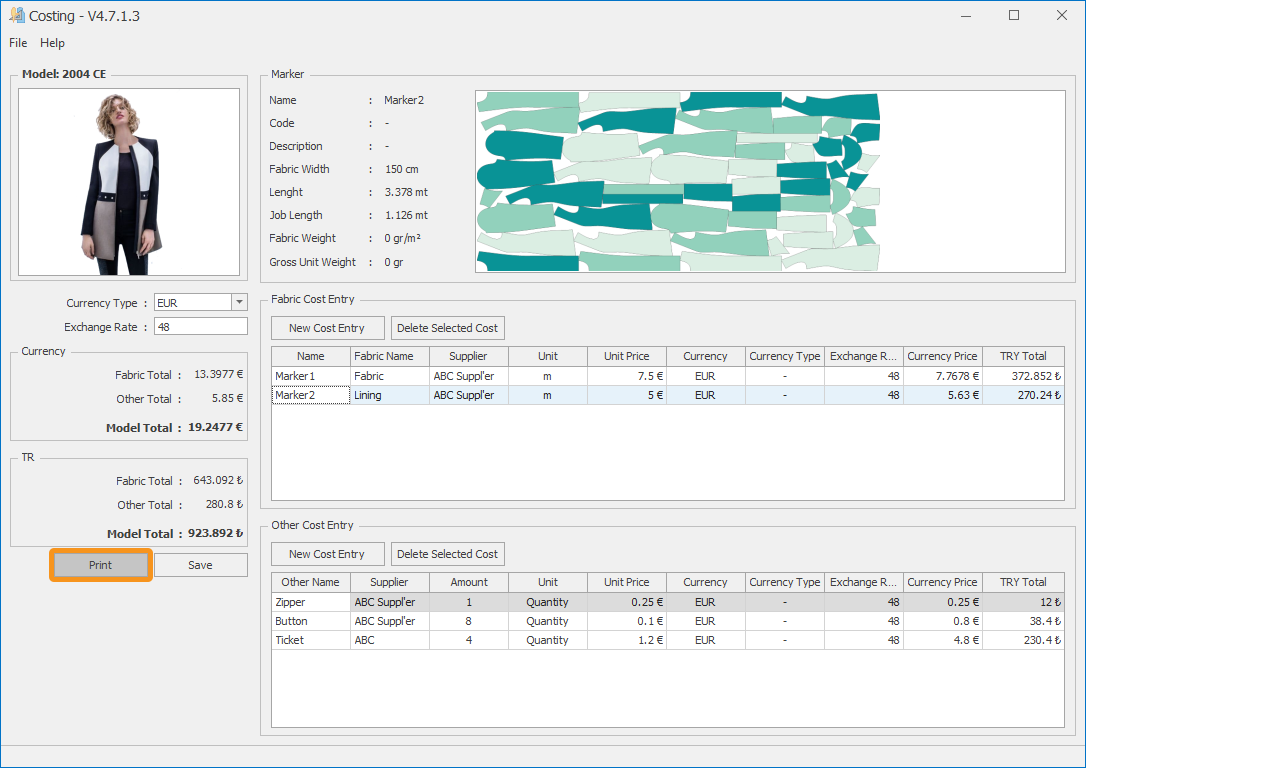
The Costing window opens. In the opened window, for fabric cost entry, click the Add New Cost button in the Fabric Cost Entry section.
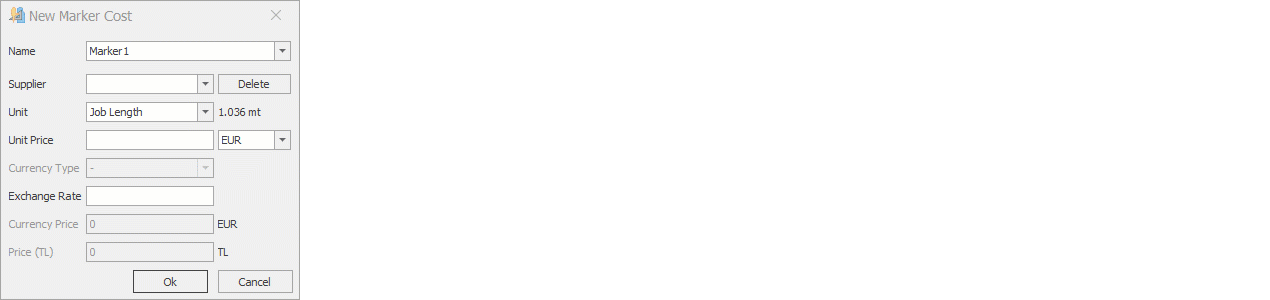
- From the Marker Name section, select the marker.
- In the Supplier Company section, enter the name of the supplier company. If the company name has been entered before, click the arrow on the right side of the window and select it from the list.
- From the Unit section, select the type of unit consumption (unit length or unit weight).
- In the Unit Price section, enter the price of the product (price per meter or per kilogram).
- In the Currency section, select the currency type if the cost calculation will be done in a different currency.
- In the Exchange Rate section, enter the exchange rate of the selected currency.
- Click Ok to save and return to the costing window.

The fabric cost of the marker for a job is displayed in both foreign currency and Turkish Lira (TL).

After the fabric cost entries are completed, other cost entries are made. Click the Add New Cost button in the Other Cost Entry section.

In the opened window, the cost values of the materials and operations to be used and performed for the production of one unit of the model are entered.
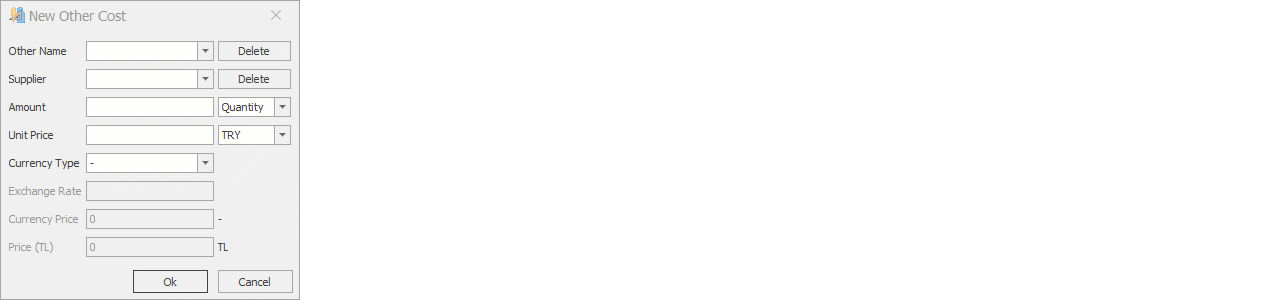
- In the Other Cost Name section, the name of the cost is entered (button, zipper, subcontracting, ironing & packaging, other expenses, etc.).
- In the Supplier Company section, enter the name of the supplier company of the material used. If the company name has been entered before, click the arrow on the right side of the window and select it from the list.
- In the Quantity field, enter the amount and unit to be used for one piece.
- In the Unit Price field, enter the price of the product.
- In the Currency field, select the currency type if the cost calculation will be made in a different currency.
- In the Exchange Rate field, enter the exchange rate of the selected currency.
- Click Ok to save and return to the costing window.

The total of all entered costs is displayed in the left column of the costing screen in both TL and foreign currency.
If desired, the exchange type and exchange rate can be modified in this section.

After all cost entries are completed, the generated cost table can be printed using the Print button or saved in different file formats (Excel, Word, PDF, etc.).
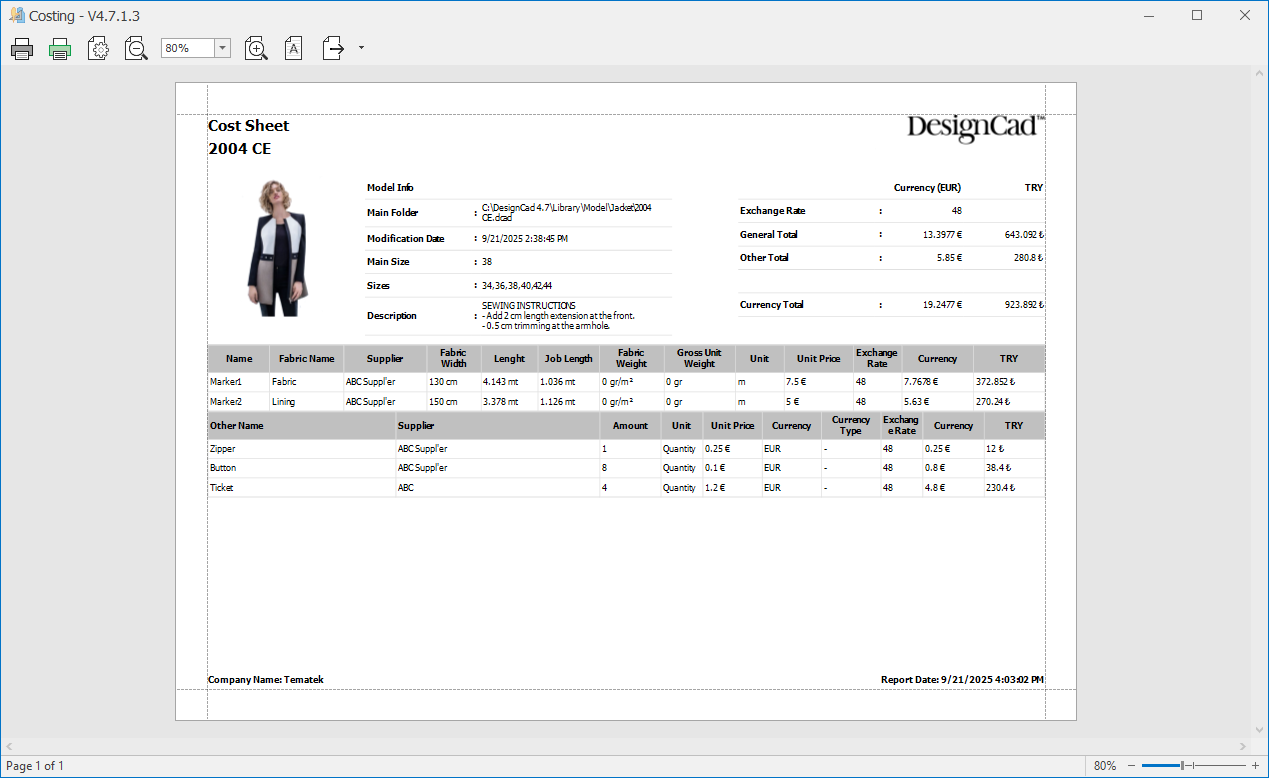
![]() Print: Opens the printer page. From the opened window, the printer is selected, page settings are adjusted, and the file is sent to the printer with the Print button.
Print: Opens the printer page. From the opened window, the printer is selected, page settings are adjusted, and the file is sent to the printer with the Print button.
![]() Quick Print: Sends the page to be printed directly to the default printer connected to the computer.
Quick Print: Sends the page to be printed directly to the default printer connected to the computer.
![]() Page Setup: Configures the printer page settings (size, orientation, and margins are adjusted).
Page Setup: Configures the printer page settings (size, orientation, and margins are adjusted).
![]() Zoom Out: Zoom out from the page.
Zoom Out: Zoom out from the page.
![]() Zoom In: Zoom in on the page.
Zoom In: Zoom in on the page.
![]() Watermark: From the opened window, warning texts can be added to the page to be printed (for example: seen, approved, etc.).
Watermark: From the opened window, warning texts can be added to the page to be printed (for example: seen, approved, etc.).
![]() Export Document: Used to save the page to be printed in different formats (pdf, doc, xls, text, etc.).
Export Document: Used to save the page to be printed in different formats (pdf, doc, xls, text, etc.).
![]() If any of the markers that make up the cost calculation are deleted, a warning will appear when the costing screen is opened.
If any of the markers that make up the cost calculation are deleted, a warning will appear when the costing screen is opened.
