DesignCad
- Started
- What's New V.4.7
- Getting Started
- Home Screen
- Dxf Send/Receive
- Model Design
- Point Operations
- Grading
- Pieces Operations
- Plot Piece
- Print Piece
- Measurement
- Sewing Processes
- Dart/Pleat Operations
- Internal Shape / Internal Point
- Marker Operations
- Marker Print
- Super Marker
- Technical Card Operations
- Cost
- Plot Marker
- Options
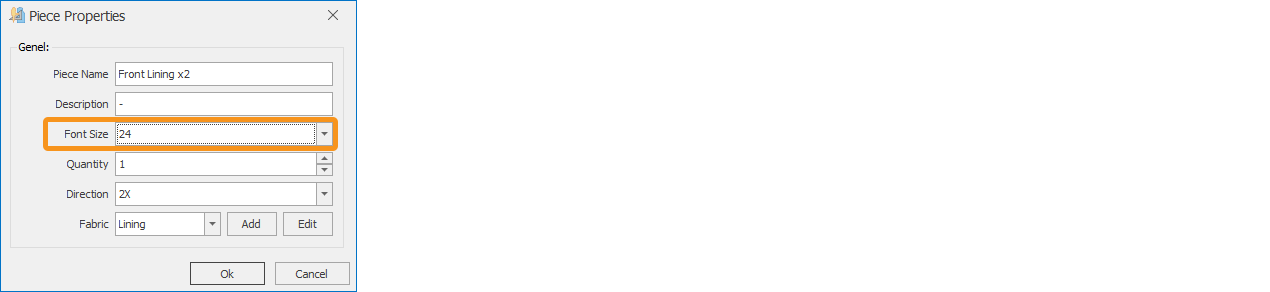
Piece Properties
To modify the properties of a piece, follow these steps:
In the Pattern Design screen, right-click the piece whose properties you want to change and select Piece Properties from the context menu.

In the window that opens, make the desired changes:
- The Piece Name can be changed if desired.
- Additional information about the piece can be entered in the Description field (e.g., an alternative name or article number).
- The Text Size field allows you to adjust the font size of the piece information in the marker output (default is 12).
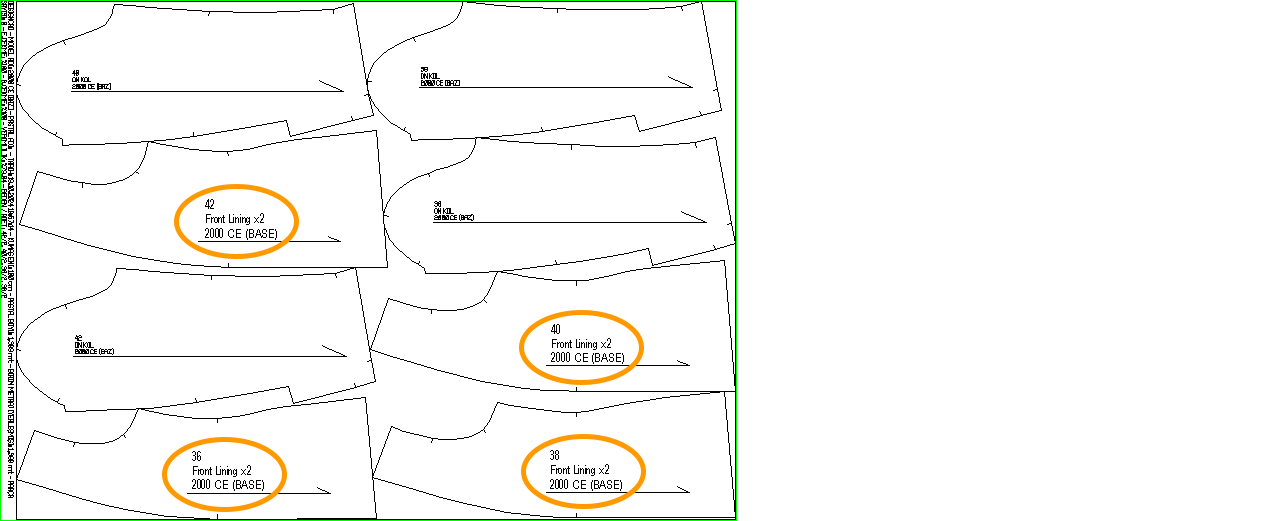
For example, if the text size for the “FRONT SLEEVE” piece is changed from 12 to 24, the font will appear larger in the output.
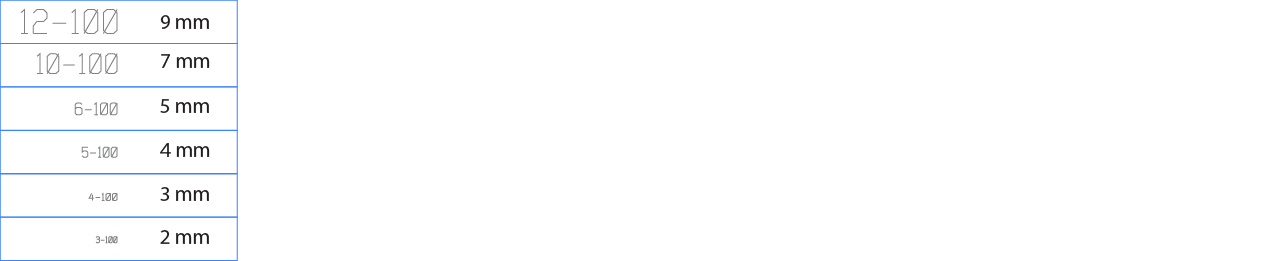
The table below shows the actual dimensions of the selected Text Size in the plotter output.
The Quantity field determines how many units of the piece will be added to the marker. For example, if the quantity in the piece properties is set to 2, and 1 unit of the piece is taken during marker creation, 2 × 1 = 2 pieces will appear in the marker screen.
The Direction field specifies the orientation of the piece in the marker layout (for more details, see the Piece Editing section):
- Org: The piece is placed in the marker as drawn in the Pattern Design screen.
- Flip: The piece is placed in the marker rotated 180 degrees from its saved orientation in the Pattern Design screen.
- 2X: The piece is added to the marker twice, with a copy along the X-axis.
- 2Y: The piece is added to the marker twice, with a copy along the Y-axis.
Click the arrow next to the Fabric section to list the fabrics added during the model creation stage and assign the desired fabric to the piece.
Click the Add box to add a new fabric. Enter the Fabric Name (or select from the general fabric library), choose the fabric color, and click OK to add it to the model. This fabric will also be added to the general fabric library.
Click the Edit button to modify the name and color of an existing fabric (this change will also update the general fabric library).
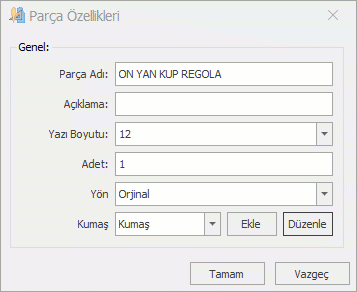
After making all the changes, click the Ok button to confirm and close the Piece Properties window.