Marker Questions
This section includes questions related to the Marker section.
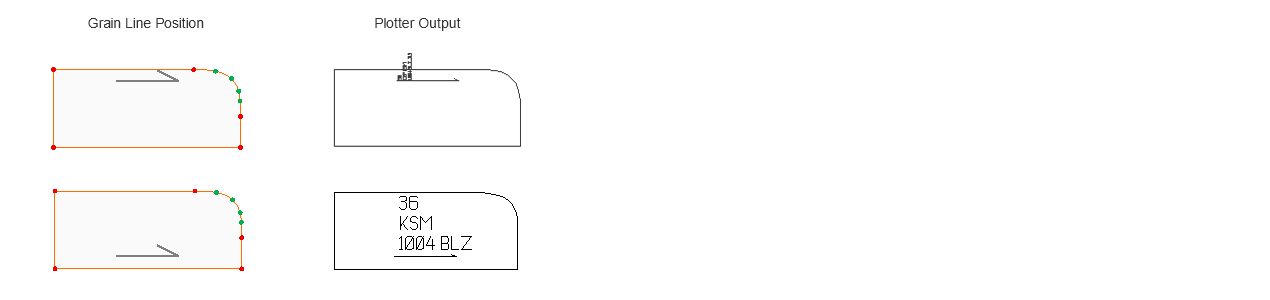
The part information is positioned relative to the straight thread of the part and its size is automatically adjusted so that it stays inside the part. However, in case the part information protrudes outside the part in the plotter output, you can correct this problem by checking the following steps:
- Position of the straight thread:
The part information is located at the top of the straight thread. Therefore, position the straight thread accordingly to the part information.
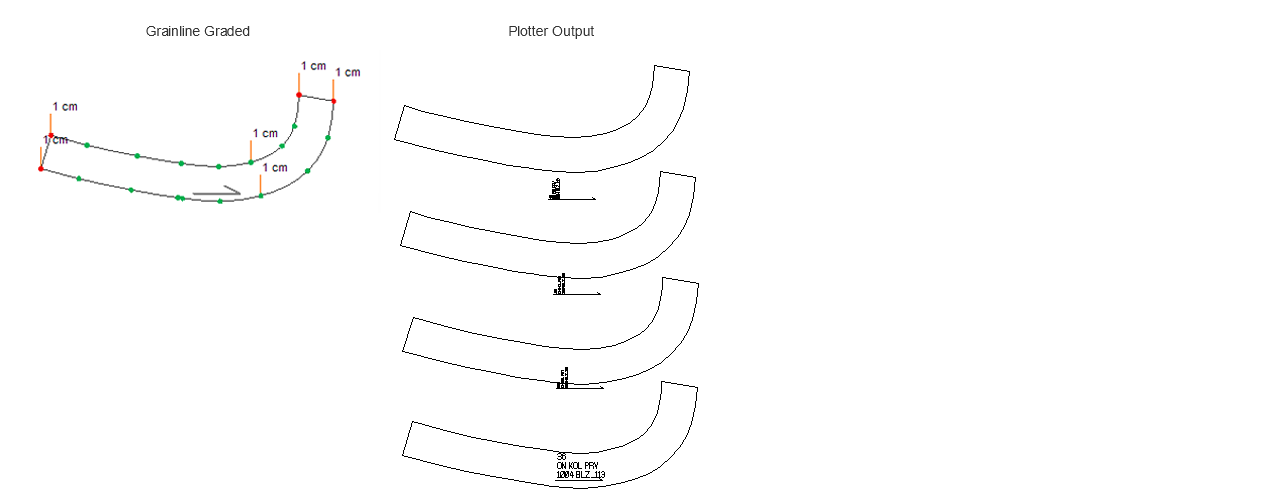
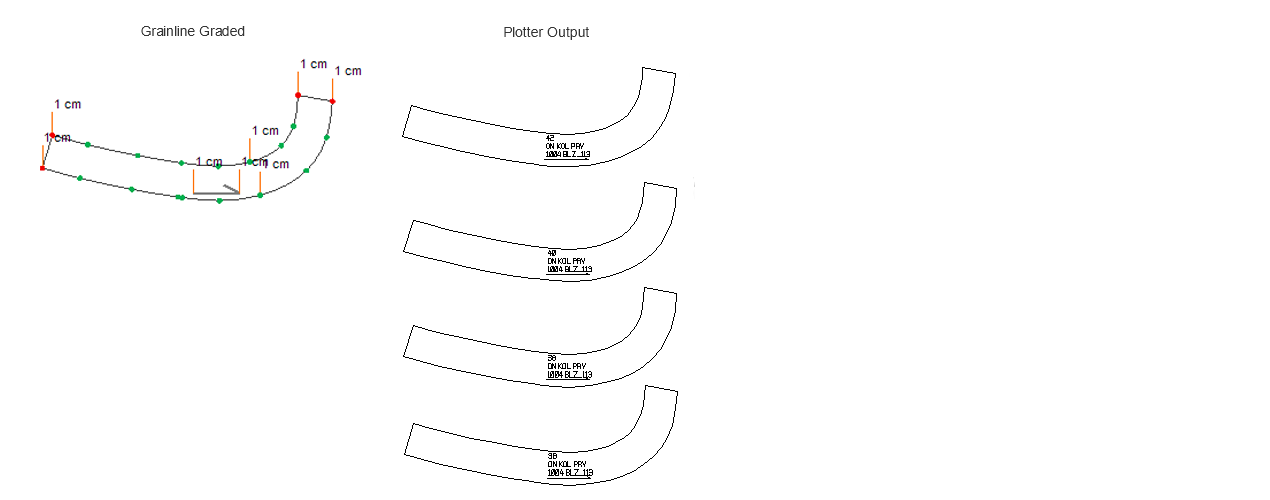
- Giving a serial value to the straight thread:
If the piece has a series and the straight thread is not given a series value, the piece text may stay in the center on the base size, while on the series the piece text may overflow out of the piece. To avoid this problem, the straight thread should be serialized according to the piece.
In DesignCad software, you can create a common marker plan by taking pieces from multiple models.
- On the New Marker screen, during the marker selection process, you can also add pieces from other models within the folder through the Model Name section.
- The pieces you add will appear on the marker sheet in a separate tab.
If you wish, you can also add pieces to the marker from models located in different folders within the main model library.
- On the New Marker screen, click the Change Folder section, and from the window that opens, select a different folder from the main library.
- The models inside the selected folder will appear in the Model Name window.
- From the models listed in the Model Name window, you can choose the desired model and add pieces from that model to your current marker.
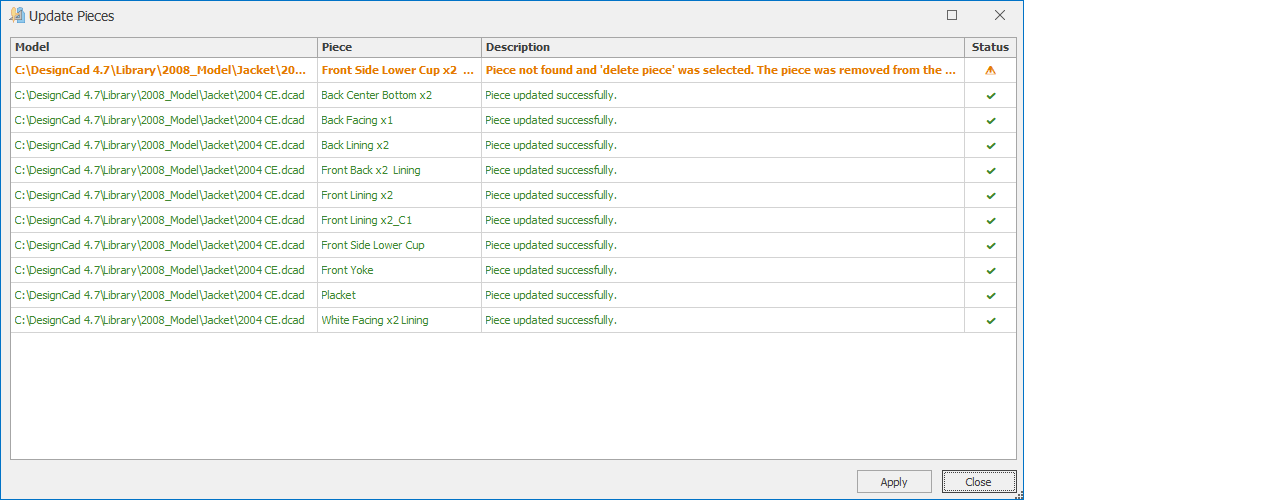
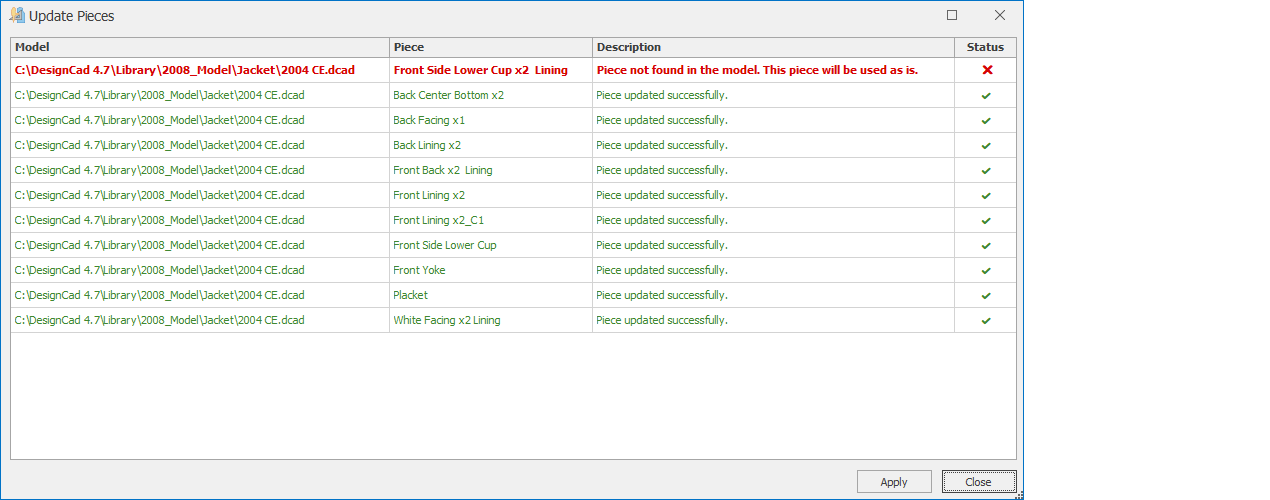
If you delete a piece from the Marker in the Model Design or Pattern Design screen, you can still open the marker in its original state. However, when you click the Update Pieces ![]() icon, DesignCad will display a warning screen indicating that the deleted piece cannot be found.
icon, DesignCad will display a warning screen indicating that the deleted piece cannot be found.
On this screen:

If you click Save, the piece remains in the marker in its original form, and at the end of the process, a report screen displays the message:
“Piece not found in the model. This piece will be used as is.”
If you click Delete, the piece is completely removed from the marker, and the report screen displays the message:
“Piece not found and ‘delete piece’ was selected. The piece was removed from the entire marker.”