DesignCad
- Started
- What's New V.4.7
- Getting Started
- Home Screen
- Dxf Send/Receive
- Model Design
- Point Operations
- Grading
- Pieces Operations
- Plot Piece
- Print Piece
- Measurement
- Sewing Processes
- Dart/Pleat Operations
- Internal Shape / Internal Point
- Marker Operations
- Marker Print
- Super Marker
- Technical Card Operations
- Cost
- Plot Marker
- Options
Plotter
This is the tab where you define how the drawing files are sent to the plotter and which marker-related information will be included in the sent file.
All pages are opened from the File menu using the Options ![]() icon, and the Plotter tab is selected.
icon, and the Plotter tab is selected.
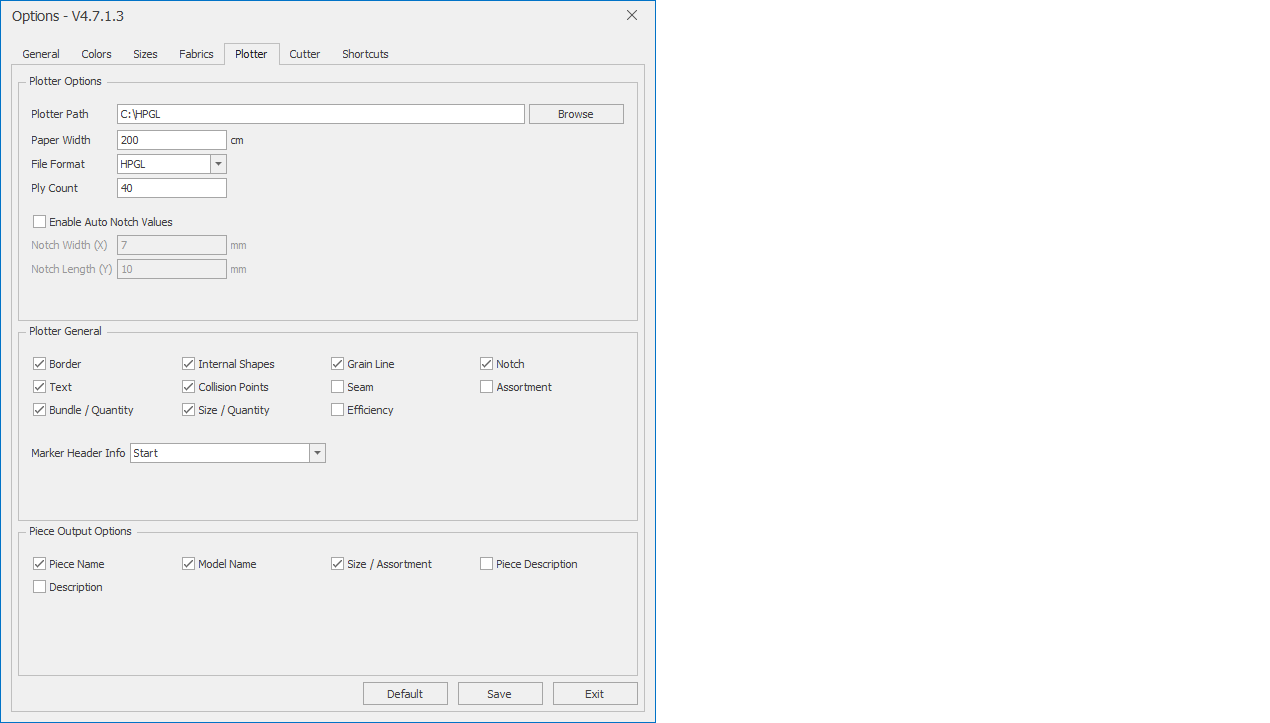
In the Plotter Options section, the plotter settings are configured.
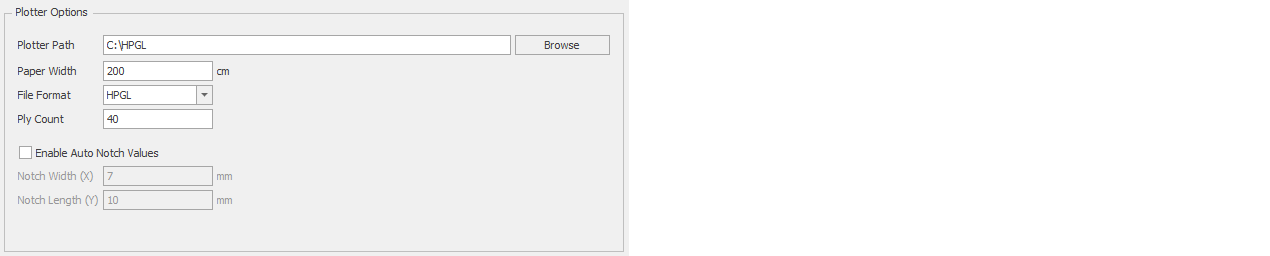
From the Plotter Path section, the location where the drawing file will be sent is selected (default C:\HPGL). It is chosen from the window opened with the Browse button.
From the Paper Width section, the maximum marker width value is entered. (If a marker is created exceeding this value, DesignCad will display a warning.)
From the File Format section, the drawing format of the file to be sent is selected according to the plotter (HPGL or HP2).

In the Coefficient section, if necessary, the coefficient of the drawing file to be sent is specified (the default is 1/0.025 = 40 mm).

If the Enable Automatic Notch Values checkbox is activated, the notches in the generated HPGL and HP2 files will have the lengths entered in the Notch Width (X) and Notch Height (Y) boxes

![]() The notch values specified in the pattern design screen are not reflected in the generated HPGL and HP2 files.
The notch values specified in the pattern design screen are not reflected in the generated HPGL and HP2 files.
In the Plotter General section, the features to be included in the output of the generated marker file are selected. The checked features will appear in the marker output, while the unchecked features will not. (By default, all are checked.)
From the Marker Header Info section, it can be selected whether the marker information text will appear at the beginning or at the end of the marker.

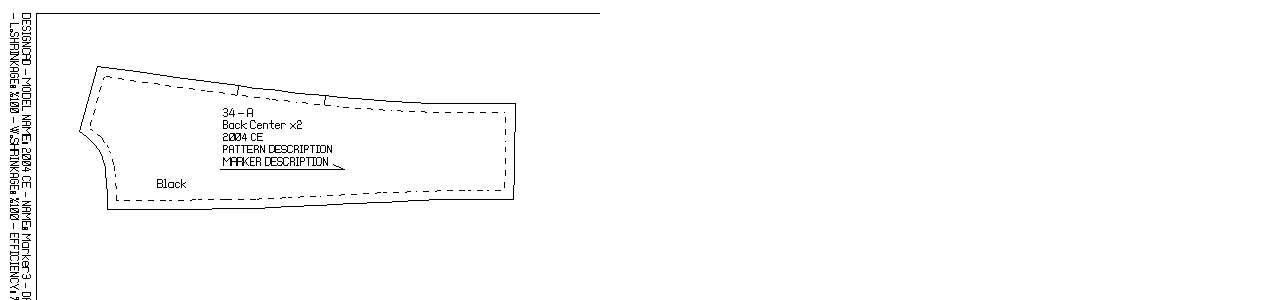
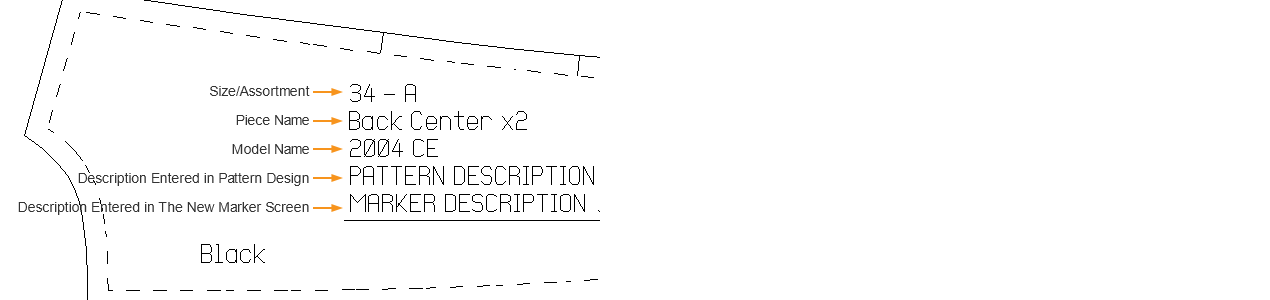
In the Piece Output Options section, you can select which information texts inside the pieces in the generated marker file will be displayed. The checked features will appear in the marker output, while the unchecked features will not. (By default, all are checked.)

After all the desired changes have been made, the changes are saved by clicking the Save button at the bottom of the Plotter tab.