Customization
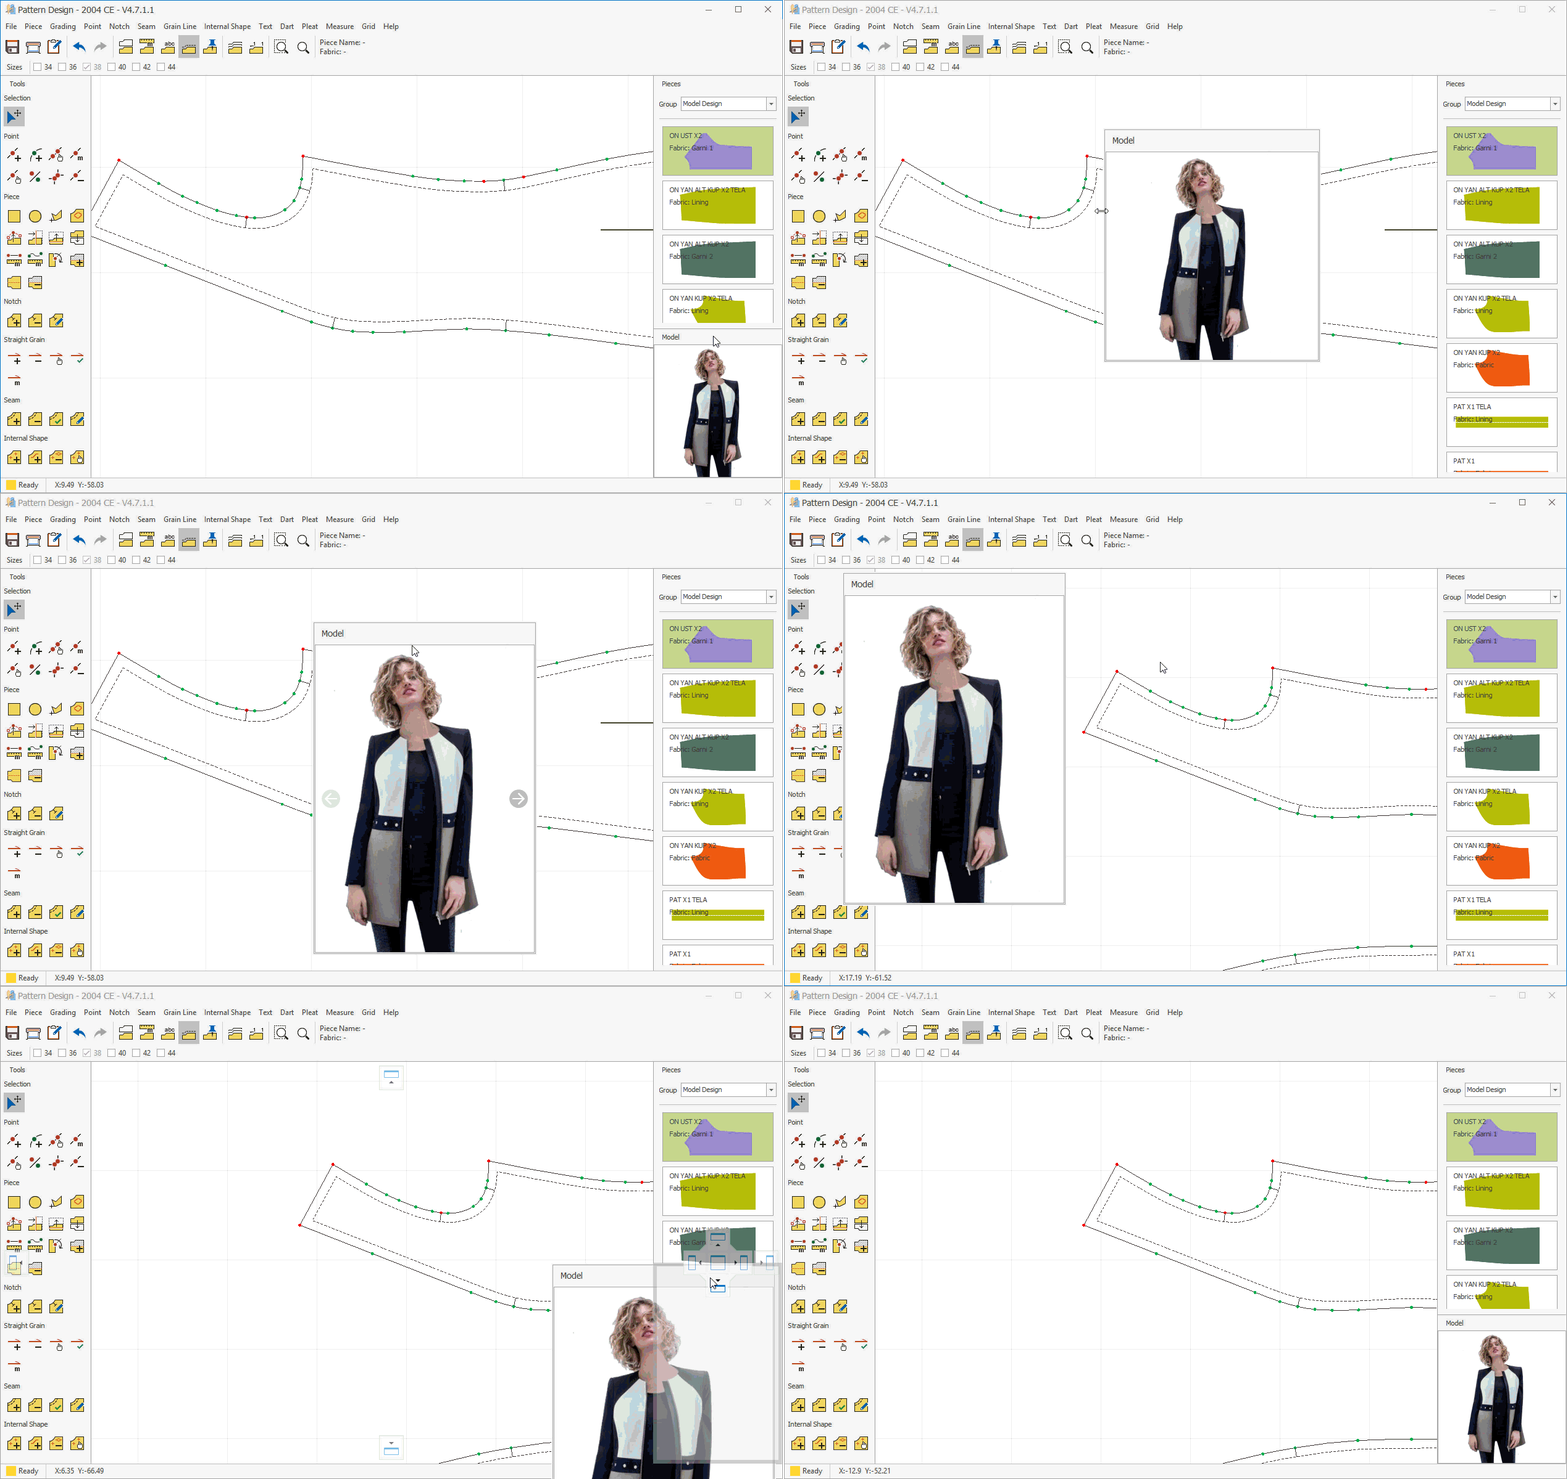
DesignCad is installed with a default startup profile that includes basic tools and options in both the toolbars and display selection windows.
If you wish, you can customize this workspace to suit your needs and preferences.
DesignCad allows you to organize and modify your workspace as desired, giving you full control over your work environment.
Theme and Color Selection:
DesignCad offers three main themes, and you can select your desired theme from the Options/Colors tab.
- Open the Options menu from the file menu on all screens and click on it.
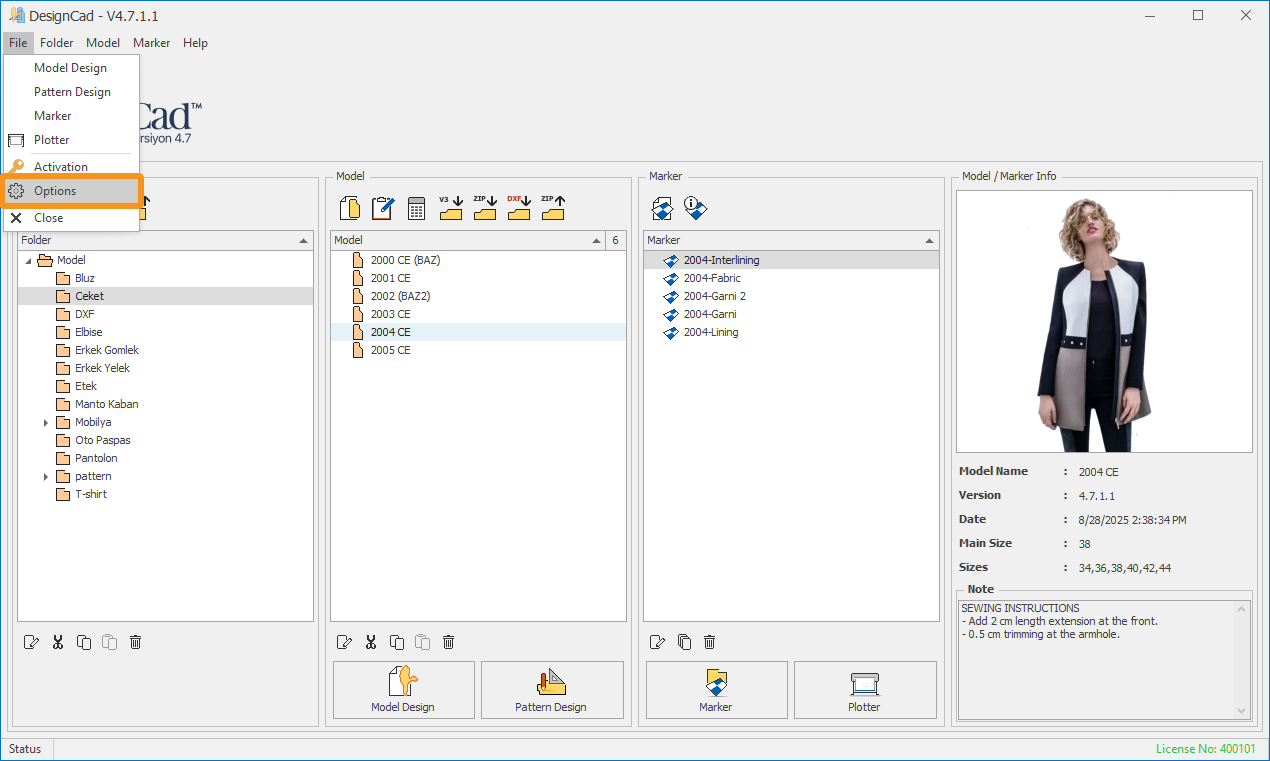
- From the Options/Colors tab, click on the Theme box.
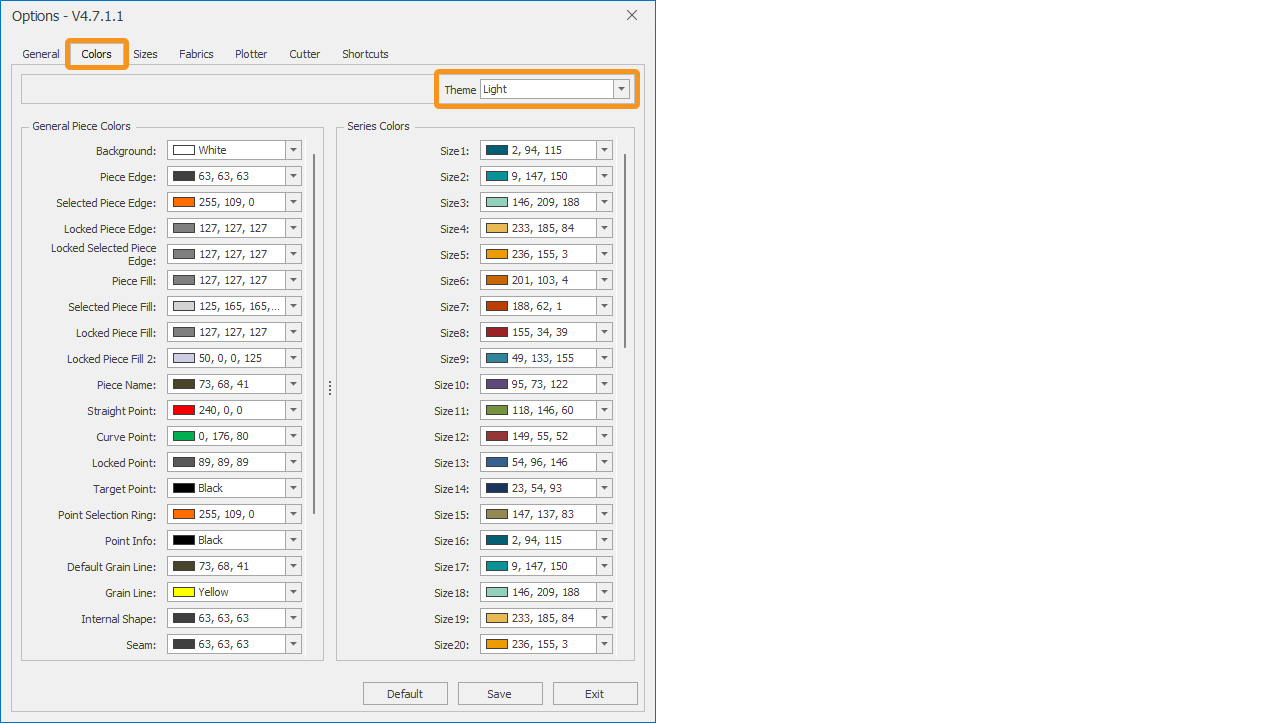
- Select the desired theme (Default, Light, or Dark).

- Click Save, then select OK in the restart prompt that appears to confirm the desired theme.

Based on the theme you select, the icons and colors on your workspace will automatically adjust. For further customization, you can set the color of any tool or element through the Colors tab.
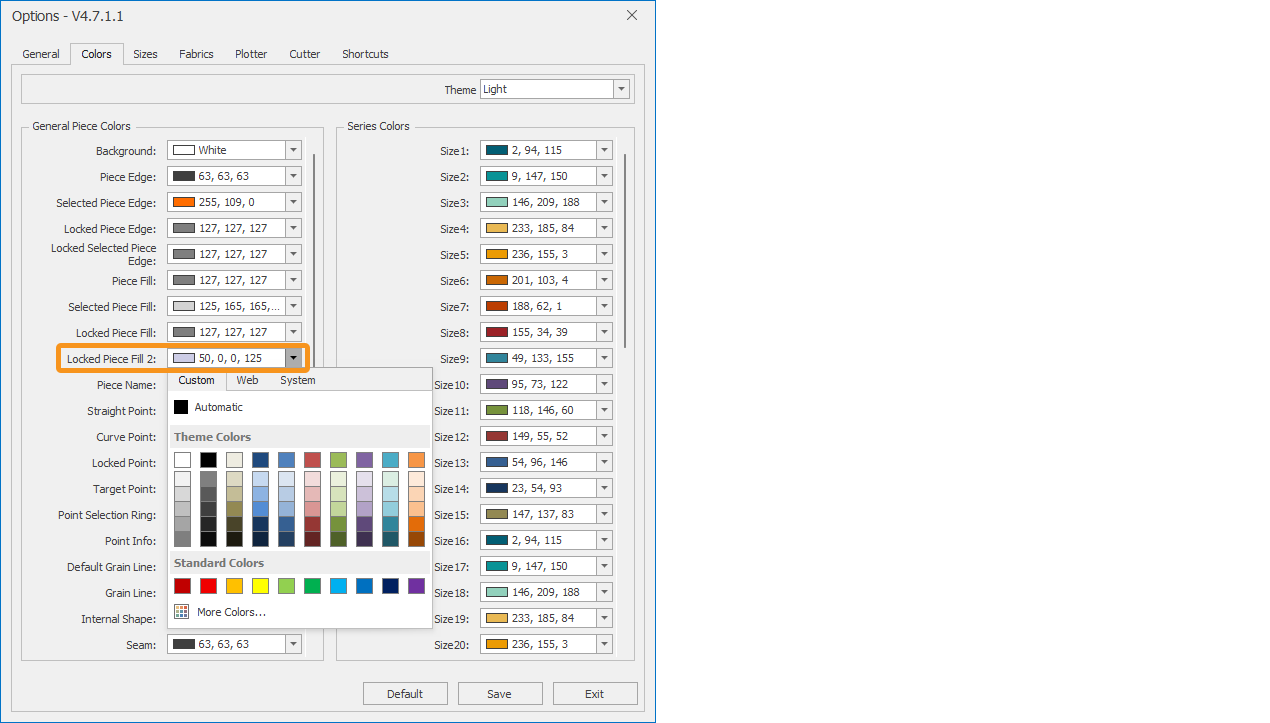
- Click the arrow next to the tool or element whose color you want to change.
- From the color window that opens, select your desired color. For additional color options, access the color palette under the More Colors section.
- Confirm your selection by clicking Save.
Customize Tools:
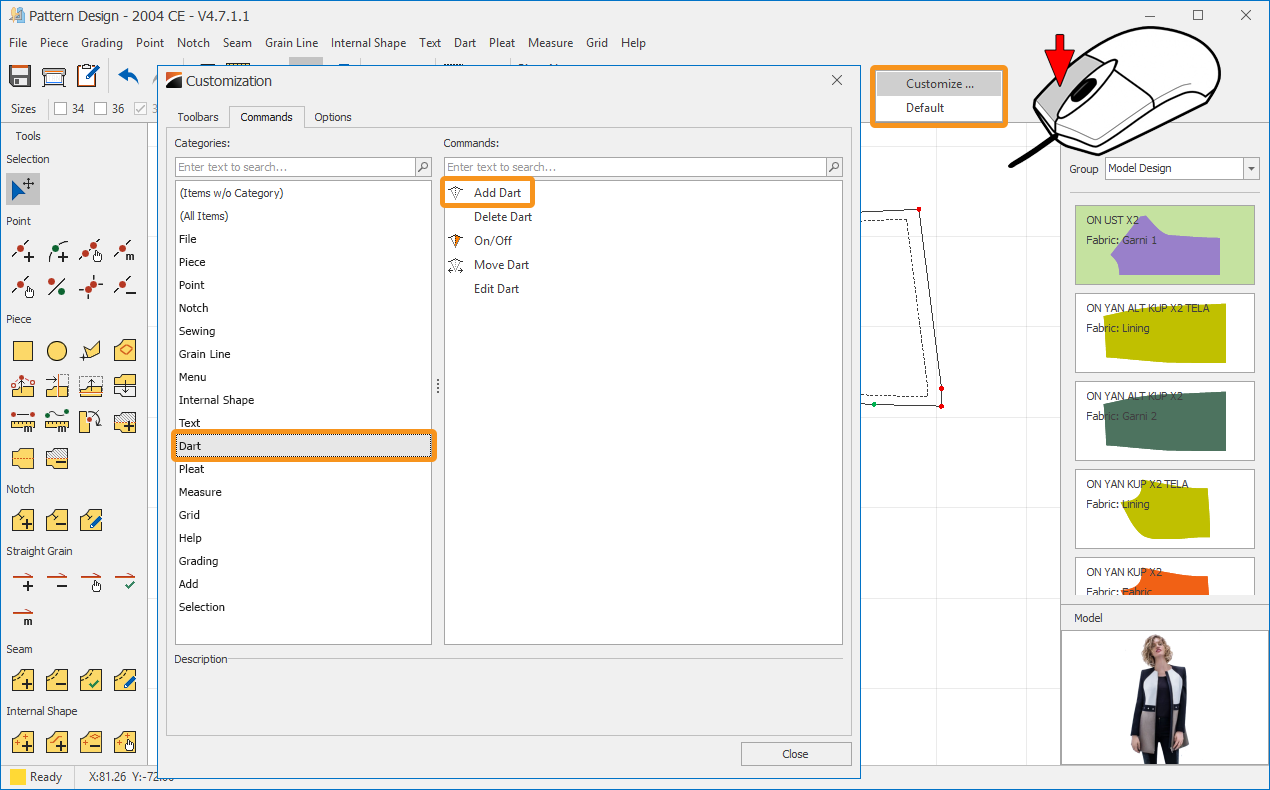
Navigate to the screen where you want to make customizations, and right-click on the top bar with your mouse.
- In the menu that appears, click on Customize.
- Select the Commands tab.
- In the Categories section, choose the menu you want to customize.
- From the Commands section, drag and drop the tools (icons) you want to include onto your desired toolbar in the workspace.
![]() While the Customize window is open, you can rearrange the icons in the toolbar by dragging them to your preferred positions or remove unwanted icons by dragging them back into the Customize window.
While the Customize window is open, you can rearrange the icons in the toolbar by dragging them to your preferred positions or remove unwanted icons by dragging them back into the Customize window.
If you prefer, you can create a new toolbar from the Toolbars tab in the Customize window.
In the window that opens, click the New button ![]() to create a new toolbar. You can drag and drop the desired icons onto this toolbar, assign it a name of your choice, and place it anywhere in your workspace.
to create a new toolbar. You can drag and drop the desired icons onto this toolbar, assign it a name of your choice, and place it anywhere in your workspace.


If you prefer, you can rearrange the toolbars (Tools, Parts, and Model View) in the Pattern Design and Marker Design screens according to your workflow. You can move them to any position on the screen and resize them by dragging the corners with your mouse.
