DesignCad
- Started
- What's New V.4.7
- Getting Started
- Home Screen
- Dxf Send/Receive
- Model Design
- Point Operations
- Grading
- Pieces Operations
- Plot Piece
- Print Piece
- Measurement
- Sewing Processes
- Dart/Pleat Operations
- Internal Shape / Internal Point
- Marker Operations
- Marker Print
- Super Marker
- Technical Card Operations
- Cost
- Plot Marker
- Options
Creating a New Model
To create a new model file within the selected folder:
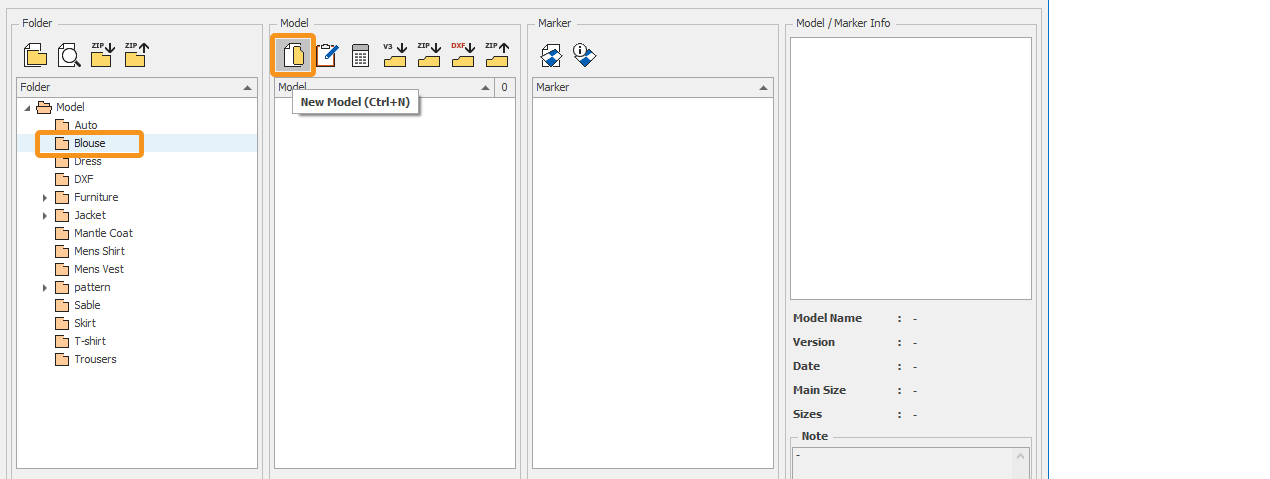
1.) In the main screen, select the folder where the model will be created from the Folder column (e.g., the "Blouse" folder), and click the New Model icon in the Model column.
2.) In the New Model Add window that opens, fill in the required fields.
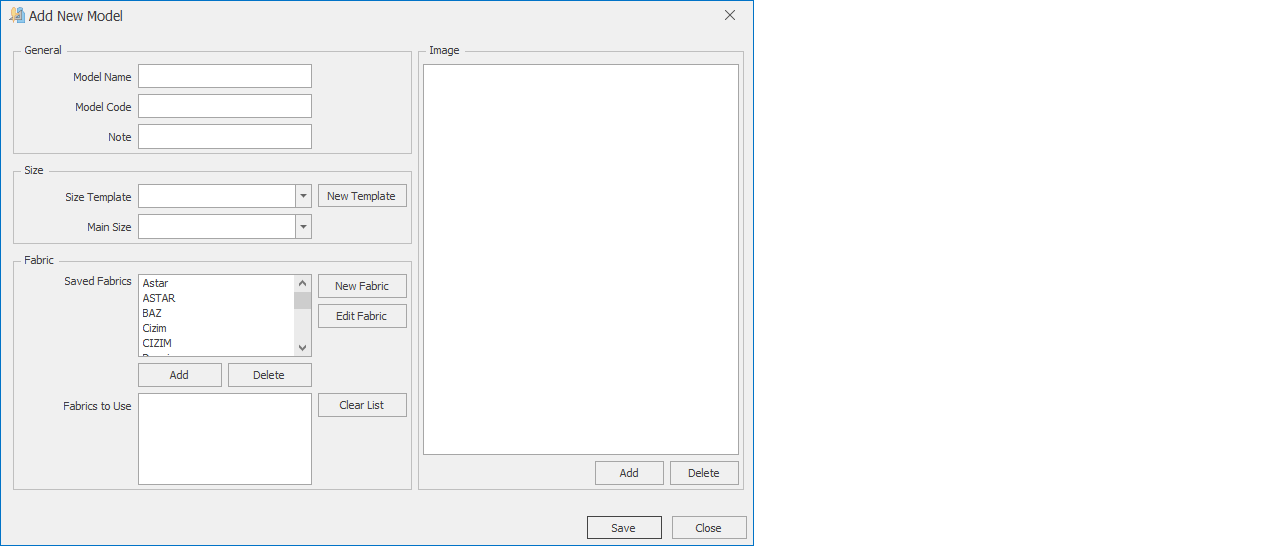
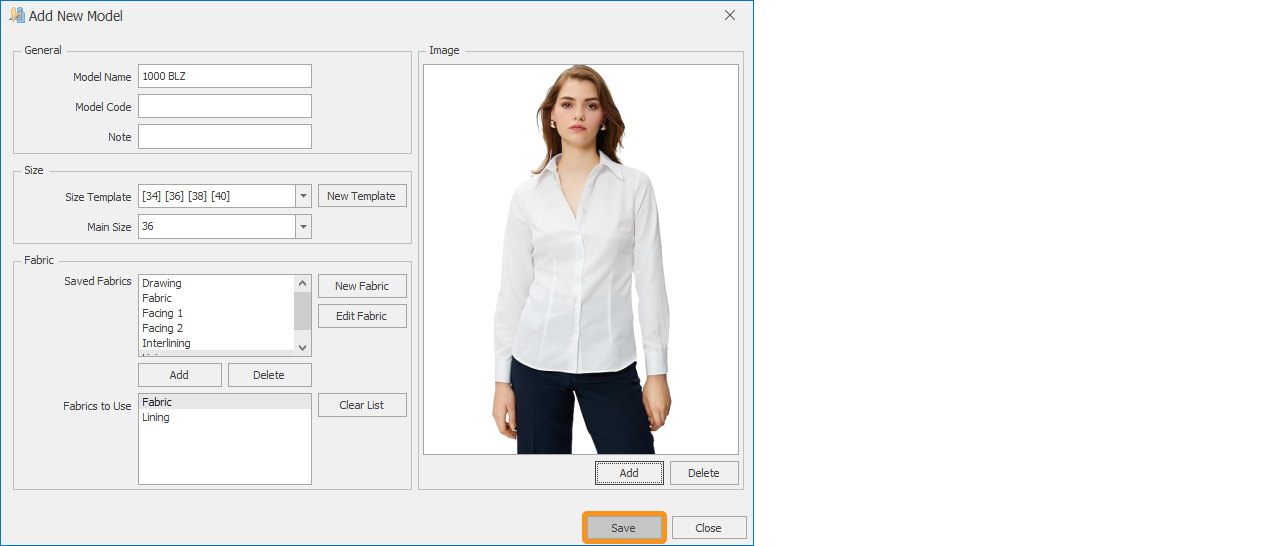
Model Name: Enter a code number or article code for the model being created.
Model Code: Optionally, a second code number for the model can be entered.
Note: A description for the model can be entered.
Size Template: This section contains previously saved size templates. If desired, a saved size template can be selected and used from this section.

Main Size: From the size group entered or selected in the upper section, the main size is chosen.

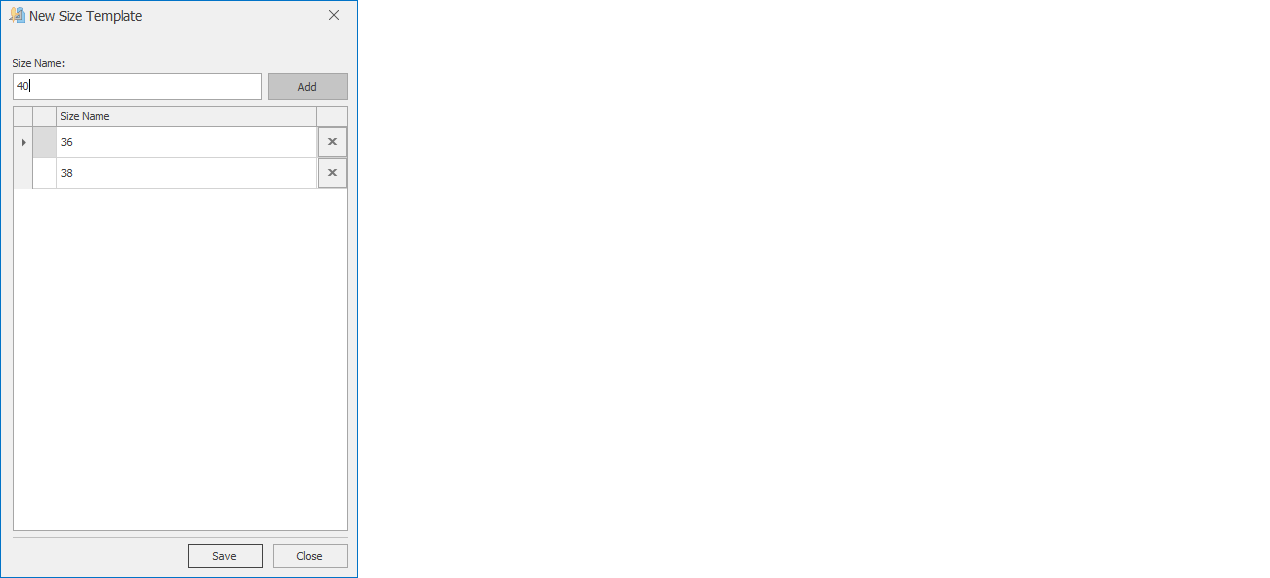
New Template: If a new size template is to be created, it is entered in this section.
- In the opened window, the desired size is written in the Size Name section.
- The size is added by clicking the Add button or pressing the Enter key.
- If the order of the entered sizes needs to be changed, the size rows can be selected with the mouse and moved to the desired position.
- Unwanted sizes can be deleted by clicking the X button.
- After entering the desired sizes, confirm by clicking Save.
Fabric: This section is used to add fabrics that will be used in the model.
Saved Fabrics: This is where previously saved fabrics are located. Fabrics to be used in the model are selected from this section and added to the model by either clicking the Add button or double-clicking the fabric name.

If desired, by clicking the "New Fabric" button, a new fabric name can be entered in the window that opens, the color is selected, and by confirming with the ‘’OK" button, it can be added to the model.

The fabric added to the model is automatically added to the general fabric library.
To add an image to the model:
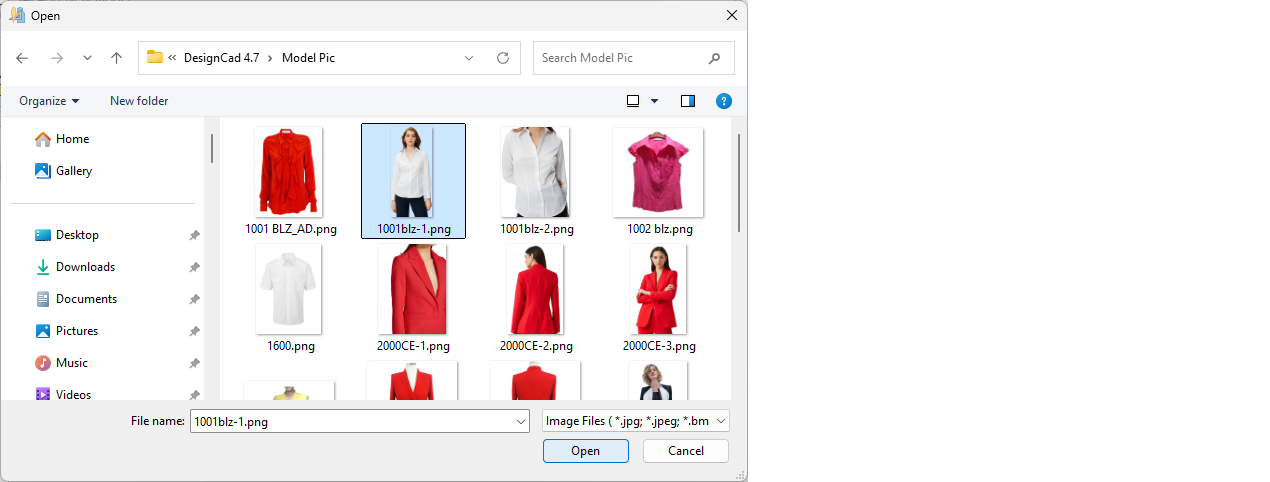
- Click the Add button below the image box. From the window that opens, select the image file to be uploaded (you can select multiple files by holding the Shift key).
- Click Open to add the image to the model.
- You can navigate between images using the arrow buttons on the right and left sides of the image window.
- When the Save button is clicked, the new model file is created, and the Pattern Design page opens.
